New Software Updates for the
GR8 Battery Diagnostic Station and the EXP-800 Diagnostic Analyzer
Nissan has taken significant steps to help improve the State-Of-Charge (SOC) of the vehicle 12 volt batteries when delivered to dealers, at check-in and PDI, during vehicle extended storage and customer delivery. These efforts will also help you with customer-owned vehicle testing and preventing excessive discharge of their batteries.
Proper storage and maintenance of vehicle batteries is essential to ensuring good 12 volt battery operating life.
Software Updates
To further support overall customer satisfaction and retention, changes have been made to 12V vehicle battery testing procedures and warranty policy. Nissan has provided diagnostic software updates which are now available for the EXP-800 and the GR8-1200-NI Battery testers. These updates will help provide you with easier navigation, and new functions that will help you perform quicker inspections and provide you with improved diagnostics. Both testers now have the following features:
- VIN print-outs (last eight characters of VIN entered)
- Larger, Warranty code print-outs
- CCA/JIS input no longer required (if the Nissan/Infiniti vehicle is equipped with an original equipment battery).
- Test results include specific recommendations
The software updates can easily be installed using the Midtronics Software Updates wizard application in ASIST. In the Tools window of ASIST, open Specialty Tools, select the applicable tool and open the Midtronics Update Wizard. Then follow the screen prompts to complete the update of the software.
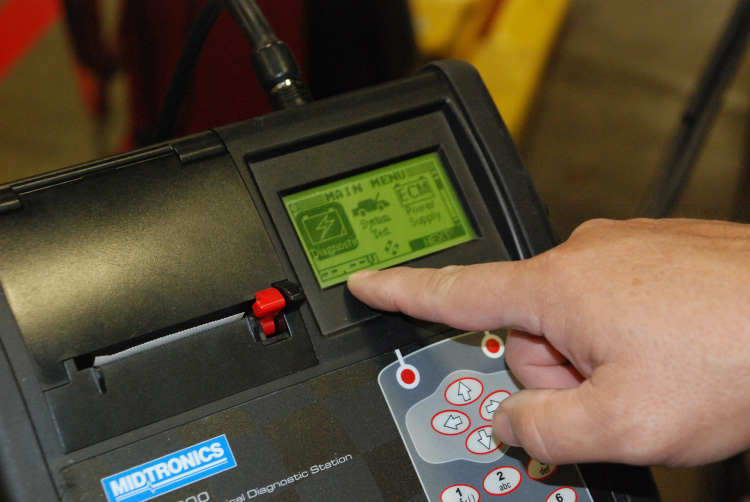
Midtronics Update Wizard
Preparing the GR8 for Update
When updating the GR8, make sure the control module is mounted, both cables attached and both units turned ON, and then connect to the ASIST terminal.
Note: Before beginning, disconnect the USB/Mini USB cable from the ASIST to GR8 if the cable is plugged in.
1. Plug the GR8 into a dedicated AC outlet, turn ON the GR8, and then click “next” on the Update Wizard.
2. If an SD card is installed, remove it until the Update Wizard on ASIST is complete, and then click “next” on the Update Wizard.
3. Connect the USB/Mini USB cable from the ASIST to the GR8. Click “next” on ASIST to begin the update process.
4. Detecting the GR8, “Please Wait” will appear on the Update Wizard screen.
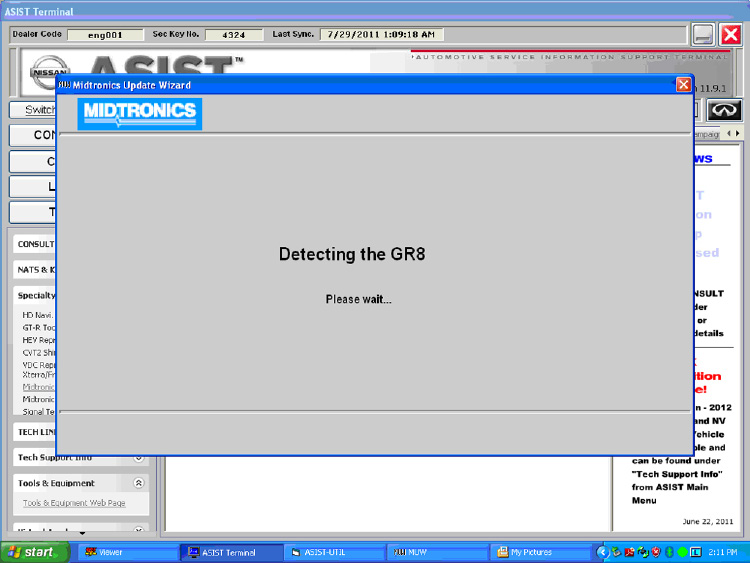
Note: DO NOT interrupt the process once started. Doing so may damage the GR8.
Preparing the EXP-800 for Update
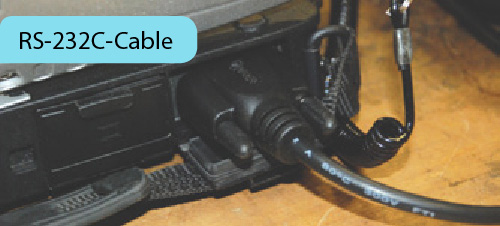
For the EXP-800, you’ll need to first connect it to a 12 volt power source. There is also a new RS-232C-Cable (serial connector-to-serial connector) that you’ll need to use to connect the EXP-800 to the port at the rear of the ASIST PC.
1. Connect the RS-232C Serial cable from the computer to the bottom of the EXP-800.
2. If an SD card is installed, remove it until the Update Wizard is complete, and then click “next” on the Update Wizard.
3. Turn ON the EXP-800. Click “next” on the Update Wizard to begin the update process.
4. Detecting the EXP, “Please Wait” will appear on the Update Wizard screen.
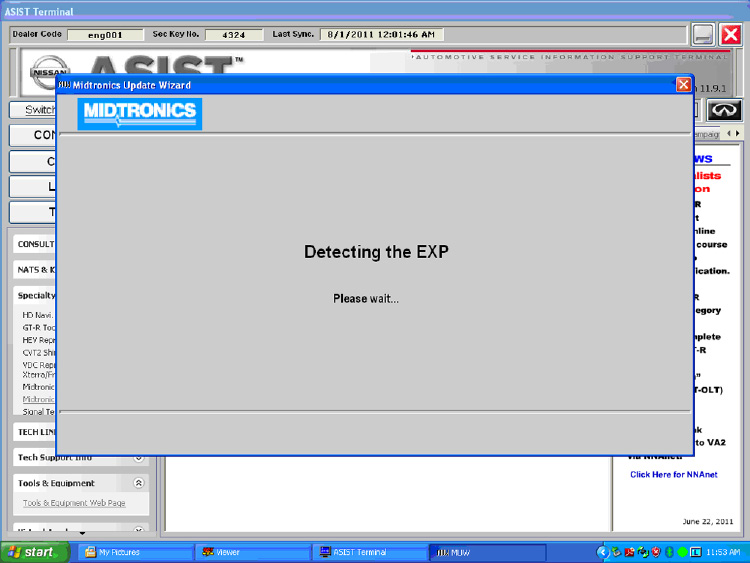
Note: DO NOT interrupt the process once started. Doing so may damage
the EXP-800.
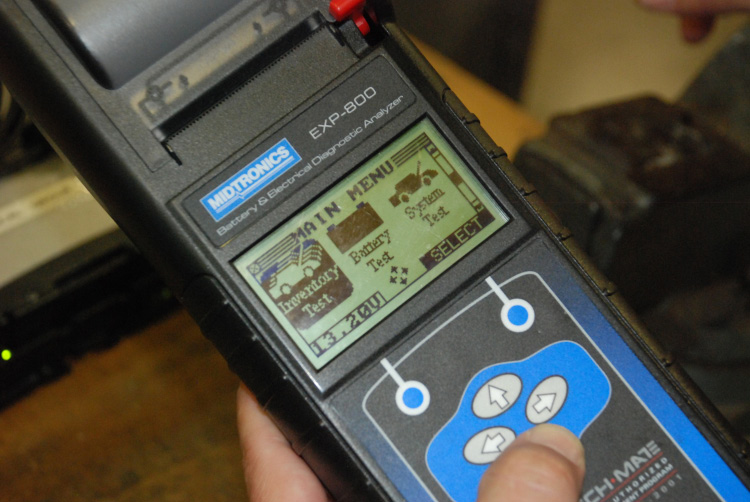
Midtronics EXP-800
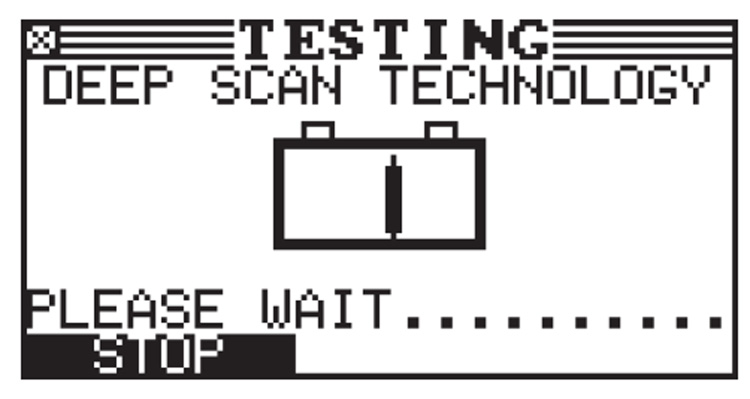
Building on advanced EXP technology with additional program management features, the Midtronics EXP-800 has dynamic conductance battery testing technology which combines direct temperature measurement with deep scan technology to improve accuracy and decisiveness.
Note: The batteries in the EXP-800 will need to be replaced periodically. The EXP-800 will not turn ON when the batteries are low.
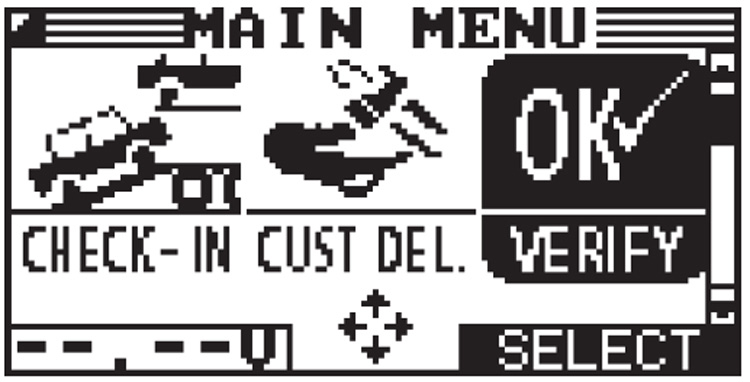
New Tester Function Modes
There are new functions for both the EXP-800 and the GR8 that consist of:
- Check-In – performed when a new vehicle comes off the truck.
- Customer Delivery – For use at sale to quickly verify the battery and electrical system of a vehicle is working properly before delivering to a customer.
- Inventory – Quickly test vehicles that have been in inventory on the lot stored for extended periods without having to re-enter their battery information each time. The decision is either PASS or FAIL indicating whether the batteries measured voltage and CCA fall out of specification.
- “OK” Verify – Verifies the battery and electrical system of a vehicle is working properly before returning to a customer after a repair.
- Roadside Function (for the EXP-800 only)
- Inventory Function and some changes to the diagnostic charge functions have also been added to the GR8
IMPORTANT NOTE: The EXP-800 can only retain 50 test results before over writing memory. Be sure to print out test results for your records, and clear the test totals.
Clearing Test Totals
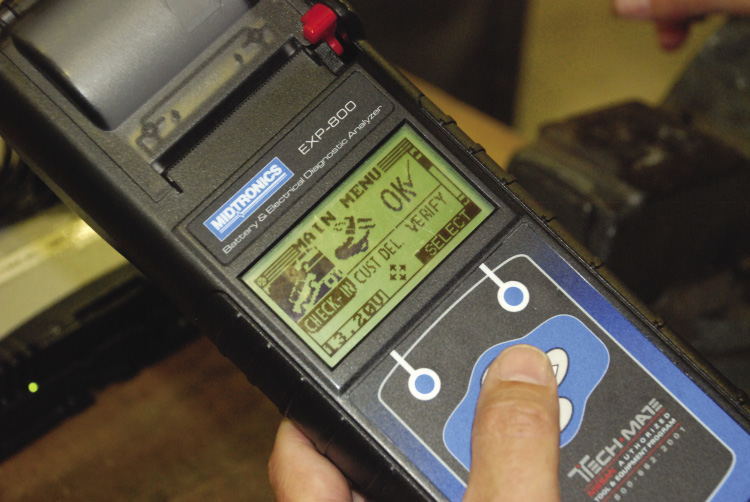
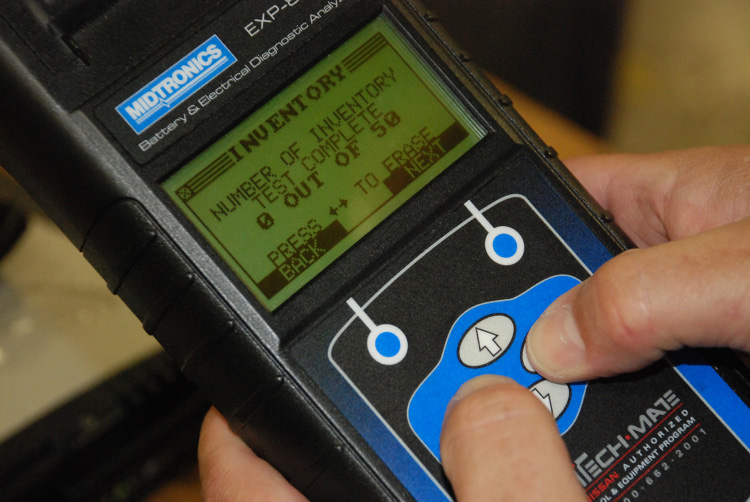
1. Select the Inventory Test icon in the Main Menu. The INVENTORY STATS screen will display on the Control Module screen.
2. Press LEFT and RIGHT arrow buttons at the same time, to erase the Inventory Test totals from Control Module memory.
Performing a Check-In Test
A Check-In Function test has been added that allows you to quickly check the battery condition of new vehicles during pre-delivery inspection, or within 72 hours of when the vehicle first arrives at your dealership.
1. Select the CHECK-IN icon from the Main Menu.
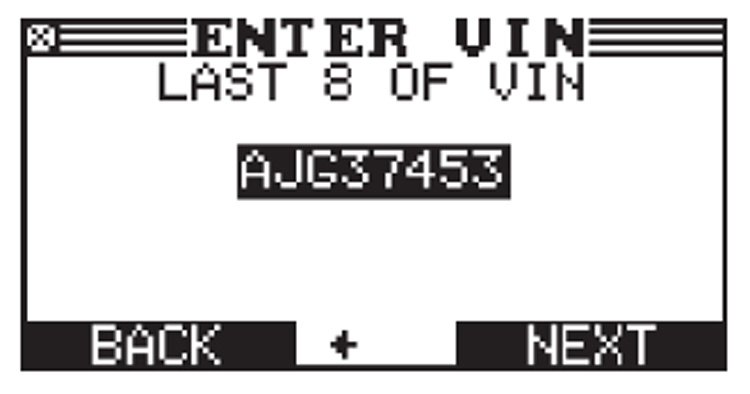
A four-row alphanumeric character map is displayed. Use the UP or DOWN and LEFT and RIGHT arrow keys to scroll and highlight to the individual characters you want to include and press the SELECT key to add them to your line of text. Enter the last 8 alphanumeric characters of the Vehicle Identification Number (VIN).
2. When you’ve correctly entered the last 8 characters of the vehicles’ VIN, press the NEXT key to begin the test.
Note: You must enter the VIN before a Check-In test can be performed.
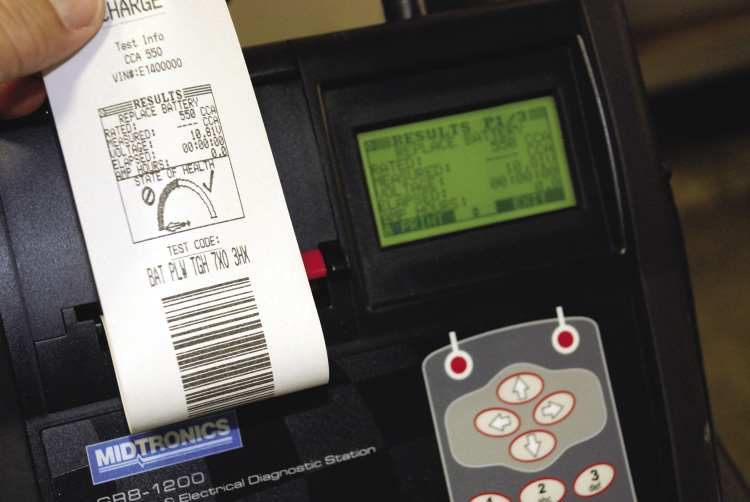
When the test is completed, a print out will be generated that indicates the test results and provides a unique test code for the vehicle showing that it was properly tested before being placed in dealer inventory. Attach this print out to the PDI or R.O., to support the pre-delivery vehicle inspection, or repair documentation.
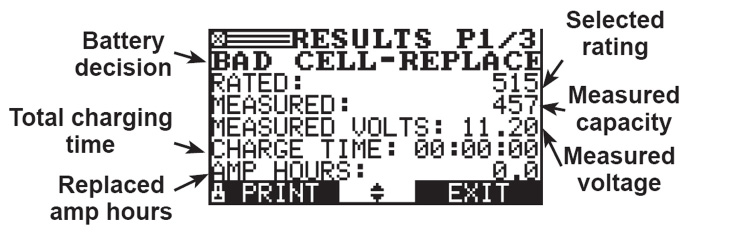
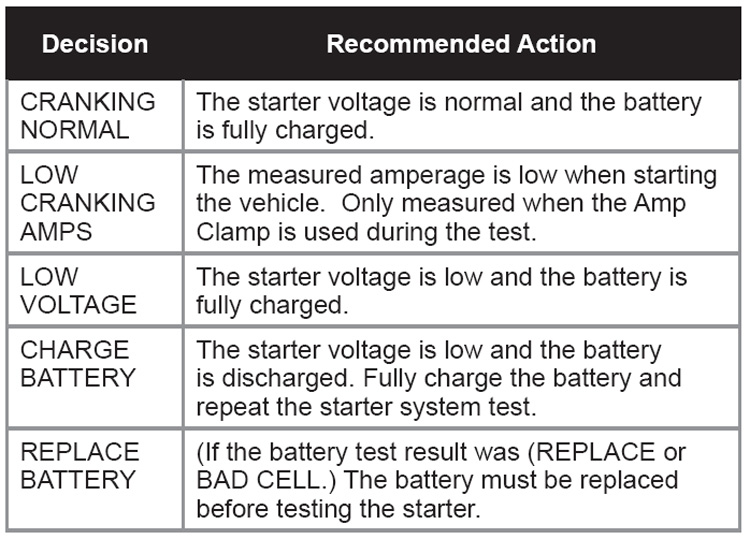
Test Results Printout
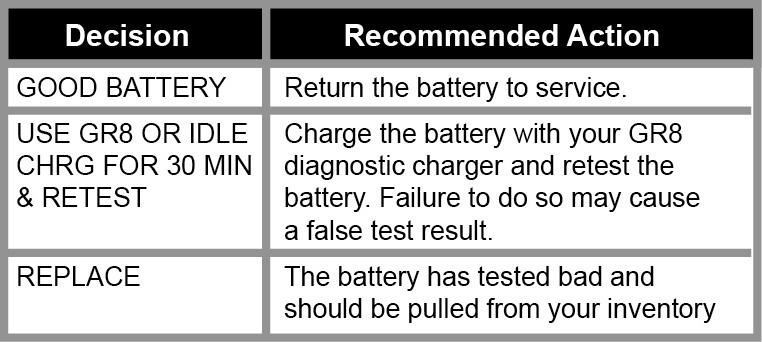
The following test results will indicate the battery condition and indicate what action should be taken:
- If the decision is GOOD; the vehicle is ready for delivery to the customer.
- For a USE GR8 or IDLE CHRG FOR 30 MIN & RETEST decision; remove the small test clamps from the battery and charge the battery for 30 minutes, either with a diagnostic charger or by idling the vehicle for 30 minutes. Retest the battery.
- For a REPLACE BATTERY result; remove the battery and replace it with a new good battery before delivering the vehicle to the customer.
Note: If the IDLE charge method is used, start the engine and turn the windshield wipers ON and then OFF. This will cause the ECM to energize the alternator and begin charging. Allow the engine to operate with no electrical load for 30 minutes, and then retest.
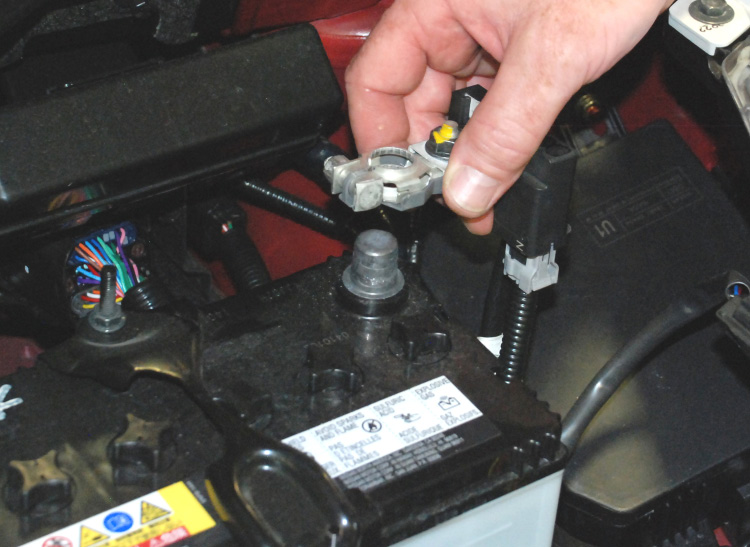
Vehicles stored in inventory with their battery cables connected should have their batteries tested every 30 days. If a vehicle is stored longer than 90 days, its battery should be charged to at least 12.5V, and the negative battery cable should be disconnected, to prevent discharge from parasitic load.
Inventory Check Function
Dealers are responsible for maintaining vehicles in their inventory. 12 volt batteries in vehicle inventory should always be kept at a full charge to prevent excessive discharge during storage and so they are ready for delivery to customers at any time.
If 12 volt batteries in new vehicles are allowed to discharge for a prolonged period of time, battery life may be drastically reduced which can lead to premature replacement and customer dissatisfaction.
It is the dealer’s responsibility to provide battery maintenance to ensure the vehicle’s battery State of Health (SOH) when the vehicle is in new vehicle inventory. An Inventory Check Function test has been added to the GR8 (like the EXP-800 function); it’s used to perform extended storage Inventory battery tests. If the battery fails during Inventory Check Function test it is necessary to charge and then retest the battery. If a battery requires replacement, this may be an indication there was a lack of adequate maintenance provided to the battery.
Customer Delivery Function

The Customer Delivery Function allows you to perform one quick “final test” to assure the battery is in good condition just prior to delivering to the customer. At the end of the sales process, you must test each vehicle’s 12 volt battery at the time of customer delivery using the Delivery Mode. Any battery whose SOC is found below a minimum of 12.4V should be charged and confirmed “OK” before delivering to a customer. Any batteries that are below 12.0V indicate the battery is not recoverable to 100% State of Charge and it should be replaced. This test also generates a unique test code to confirm the batteries’ SOC.
If the battery has been properly maintained the test outcome result will be GOOD. If the test result requires recharging, the test result outcome is use GR8 or Idle Charge for 30 minutes. The battery should be charged to the Open Circuit Voltage (OCV) of 12.4V and then retested.
“OK” Verify Function
The “OK” Verify Function allows you to quickly indicate the condition of the battery and its electrical systems when a vehicle is brought in for service prior to delivery to the customer. The “OK” verify feature will also generate a unique test code to be used for confirmation and warranty processing.
RoadSide Test Function

The Roadside Test Function of the EXP-800 performs a special purpose for those dealers who are part of the Infiniti Mobile Roadside Assistance Program. This will perform a full-system test on a vehicle whose battery has been replaced on a roadside service call. This function also produces a unique test code for the roadside assistance claim that will need to be attached to the repair order. In some cases, the GR8 may need to be used to further analyze the battery when determining whether the battery should be replaced or if it has a significant chance to be recovered.
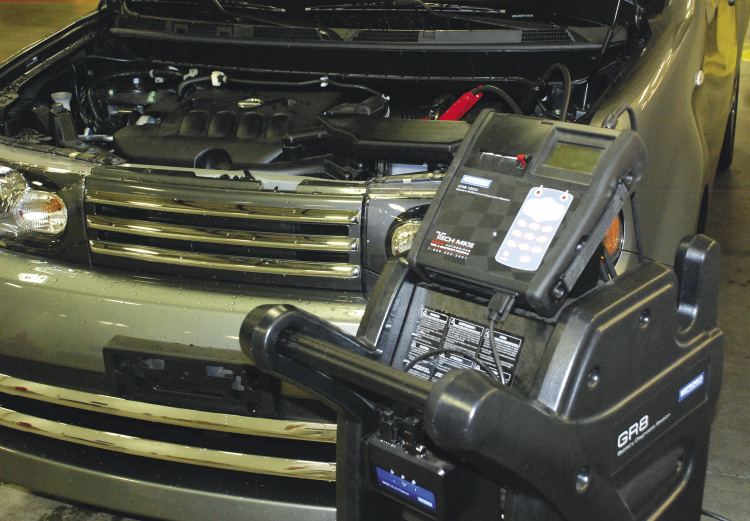
Performing Diagnostic Tests with the GR8
The Midtronics GR8-1200-NI primarily supports testing where charging may be required. The new software features customer focused enhancement. The GR8 should be used to confirm the battery’s condition, and which action to take. The GR8 first analyzes the battery and makes a decision: GOOD BATTERY, REPLACE BATTERY, or REPLACE-BAD CELL. A unique test code appears for all in-vehicle final decisions and an analysis which includes the battery State-of-Health (SOH).
SYSTEM TEST
Another factor affecting a battery’s ability to crank an engine is its actual condition or State-of-Health (SOH). It is a measure of the battery’s condition relative to a fresh battery. Based on cranking rating, open-circuit voltage, conductance (ability to deliver current) and battery temperature, the GR8 will qualify a battery as “good” or “bad” (should be replaced).
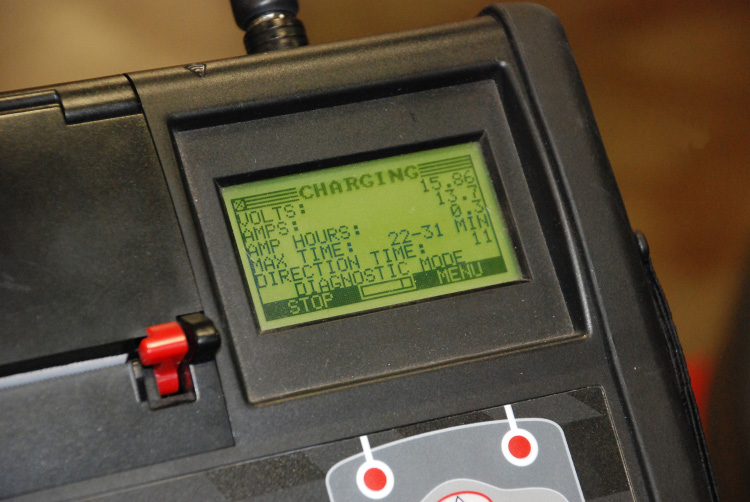
As the battery approaches the end of its life, its deterioration accelerates, until it finally fails to start the vehicle. Before failing, the battery may start the vehicle under normal conditions but may not be able to operate in more extreme conditions. Extreme heat or cold could expose a weak battery and cause it to fail. For vehicles that appear to start normally, use the System Test. This will indicate the exact cause of the battery issue and generate a unique code for warranty. It is best to use the diagnostic charge to diagnose NO Crank/No Start or Low Battery concerns. During the charging session the GR8 now provides updates of the charging voltage, charging current, the measurement in Amp hours of the amount of charge replenished into the battery, the maximum remaining time to charge, and the charging mode.
- If a battery tests “Good”, but requires charging beyond 12 minutes, the tester will show the time required to charge the battery.
- There is a “Customer Override” option after 12 minutes to enable the dealership to print a “Replace” BAT code in time-critical customer satisfaction situations.
The charge session is complete when the proper amount of charge is put back into the battery or the remaining estimated time to charge counts down to zero.
If the GR8 finds that the battery is bad before the end of the estimated time to charge, it displays the decision REPLACE BATTERY or BAD CELL-REPLACE and the results.
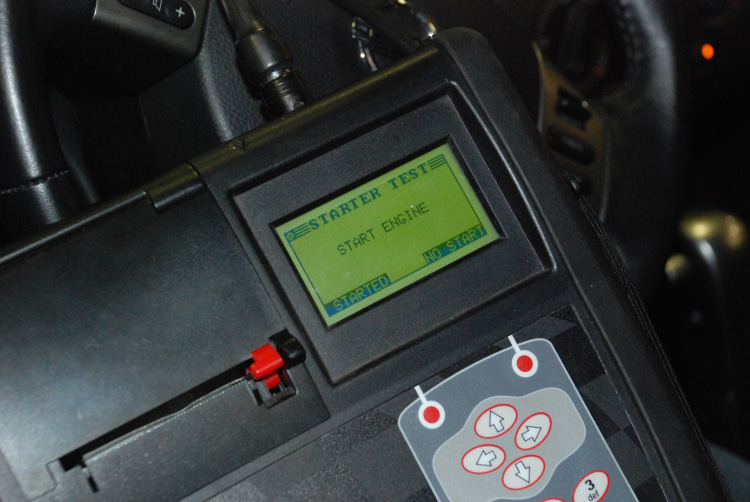
Starter Test
The Starter Test includes a diagnosis of the vehicle’s electrical system. The Starter Test is part of the System Test or OK Verify.
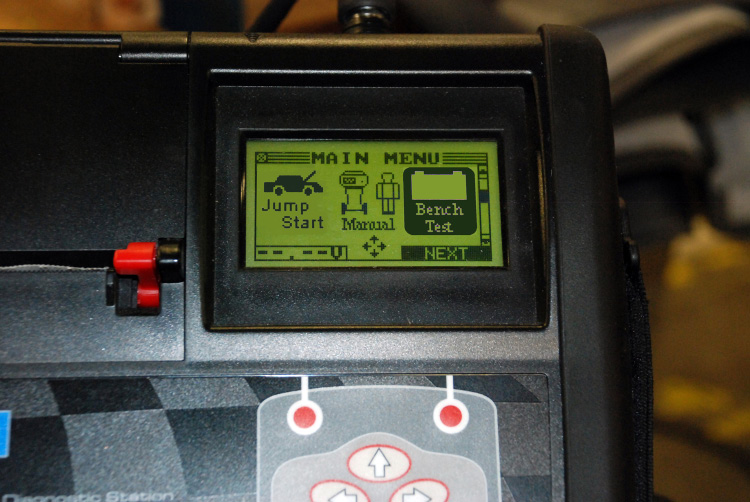
BENCH Test
For testing a battery outside of a vehicle, the system will guide you through the Bench Test. In the main menu, highlight the Bench Test icon and press NEXT. Use Bench Test for testing a battery by using the battery information you select in a series of screens. No test codes are generated during a Bench Test.
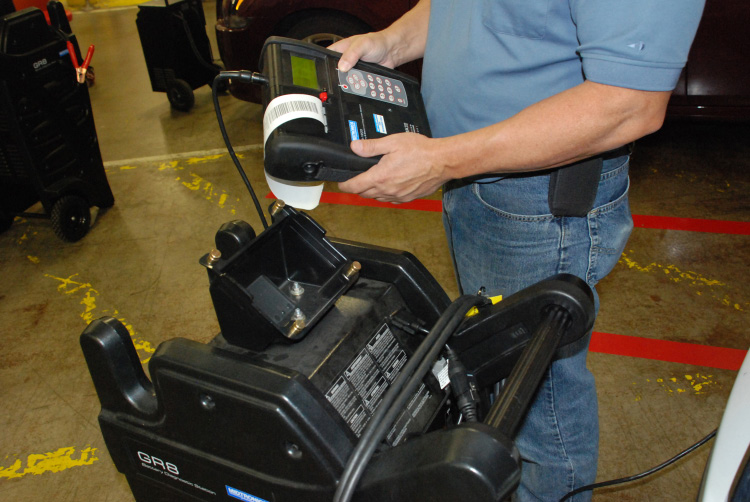
GR8 Module Usage
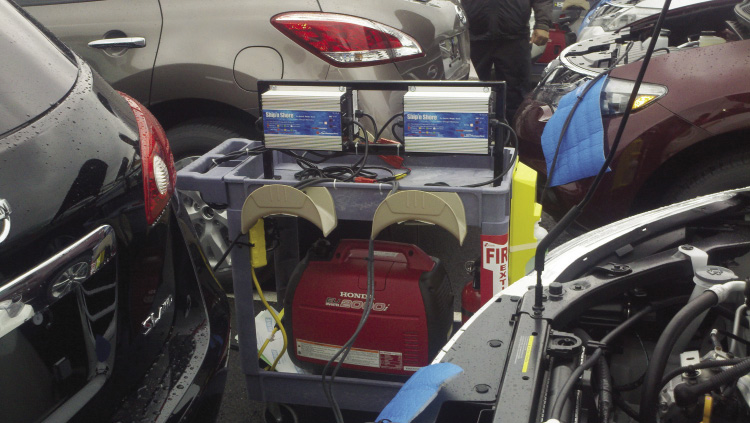
The GR8 is capable of wireless multitasking because the control module can be disconnected from the Multitasker charger station and removed to independently test the battery and electrical system of other vehicles while the Multitasker is performing a charge session.
Note: The GR8 control module uses RF radio signals that broadcast up to 300 ft. (in line of sight). The Multitasker charge session can be monitored with the control module even when it’s not connected however, internal AA battery life will be reduced.
Deep Scan Test
In some cases, the GR8 may need to further analyze the battery to determine whether the battery should be replaced or if it has a significant chance to be recovered. The Deep Scan test is something the GR8 does automatically when needed as a portion of the System Test. After the Deep Scan test the GR8 will either display the results or give you the option to perform a 10-minute Discharged Battery Test to give you a more precise result of difficult to diagnose batteries.
Service Issues
Anytime the battery is to be disconnected for any reason there are a number of items that will require attention. The radio presets must be recorded and HVAC Trim levels will need to be reset when power is restored. Other items like the power windows, as well other features such as sunroof/moonroof, and retractable hard top may need to be reinitialized when power is restored. If the battery was discharged when the vehicle was received or is received with low battery voltage, you must indicate this on the R.O.
For additional information on the software updates or the diagnostic functions of the testers, refer to the User Guides Operation Manuals located in ASIST.
IMPORTANT:
- Quarterly updates will be available for the Midtronics GR8 and EXP800 testers to ensure dealers are supplied with the latest data.
- The tester will inform the user if a quarterly update is missed.
- If updates are not performed within 30 days of
their release, battery testing functions will stop working until the update is installed.
If a vehicle is being stored on the dealer lot, routinely check the battery SOC and charge the battery as needed. Recommended checking intervals are:
- Both battery cables connected: every 30 days.
- Negative battery cable disconnected: every 90 days.