Wheel Alignment

Proper alignment to Nissan or Infiniti specs is one of the key maintenance procedures in helping to minimize tire wear, and maximize the handling, steering and suspension functionality of your customer’s vehicle. Conditions like vehicle pull or drift to the right or left when driving straight is a symptom of a with wheels out of alignment. Other conditions such as premature or uneven tire wear and steering wheel off center are also symptoms of a vehicle out of wheel alignment. A vehicle is said to pull if, with no steering input and the vehicle travelling at 60 mph in a straight and level lane, all four wheels leave the lane within seven seconds. Wheel alignment consists of adjusting the angles of the wheels so that they are parallel to each other and perpendicular to the ground to set to the vehicle specifications.
Caster, Camber, Toe and Thrust Angle
The primary suspension angles that need to be measured and adjusted are caster, camber, toe, and thrust angle.
Caster
Caster is the angle to which the steering pivot axis is tilted forward or rearward from vertical as viewed from the side of the vehicle with respect to the area where the tire contacts the road. If a vehicle has symptoms of improper caster it will probably pull toward the side with less positive caster. Caster has little or no effect on tire wear. Positive caster means the steering axis tilts rearward. Negative caster means the steering axis tilts forward. If the caster is too negative the steering will be light and the vehicle will wander away from a straight line. Nissan and Infiniti vehicles normally are adjusted to positive caster. Positive caster provides directional stability and helps the steering wheel return after cornering.

Camber
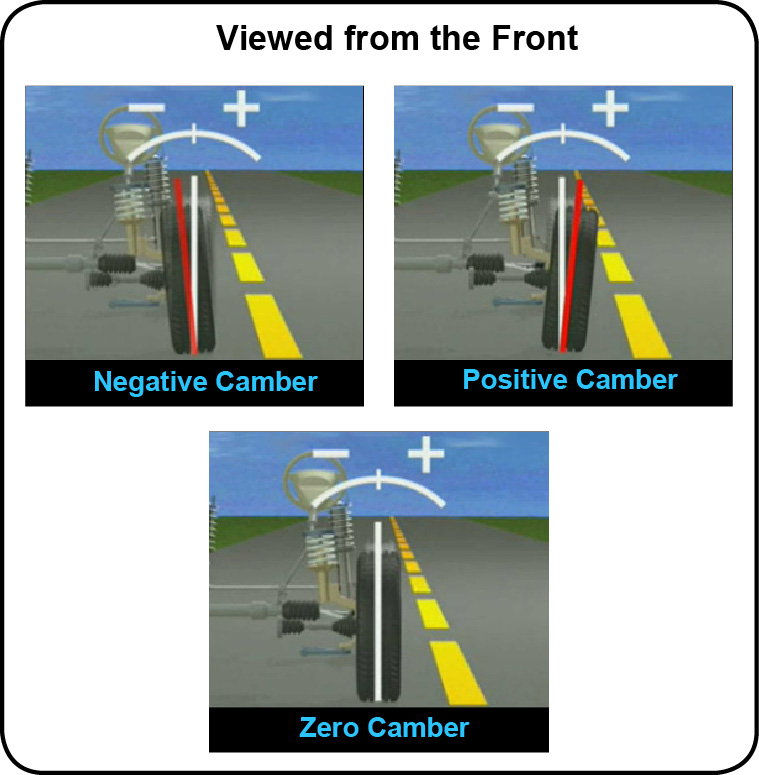
Camber is the inward or outward tilt of the top of the tire from the vertical axis of the wheels when viewed from the front. If a wheel is tilted outward from the center of the vehicle it has positive camber, if it’s tilted inward from the center of the vehicle it has negative camber. Camber set at the optimal setting ensures a minimum of tire wear because it achieves the largest possible tire contact area. This is because the camber stays near zero degrees while the vehicle is moving. While negative camber improves grip when cornering, improper camber adjustment will cause the vehicle to pull to the side with the most positive or negative camber adjustment, and in extreme cases produce tire edge wear.
Toe
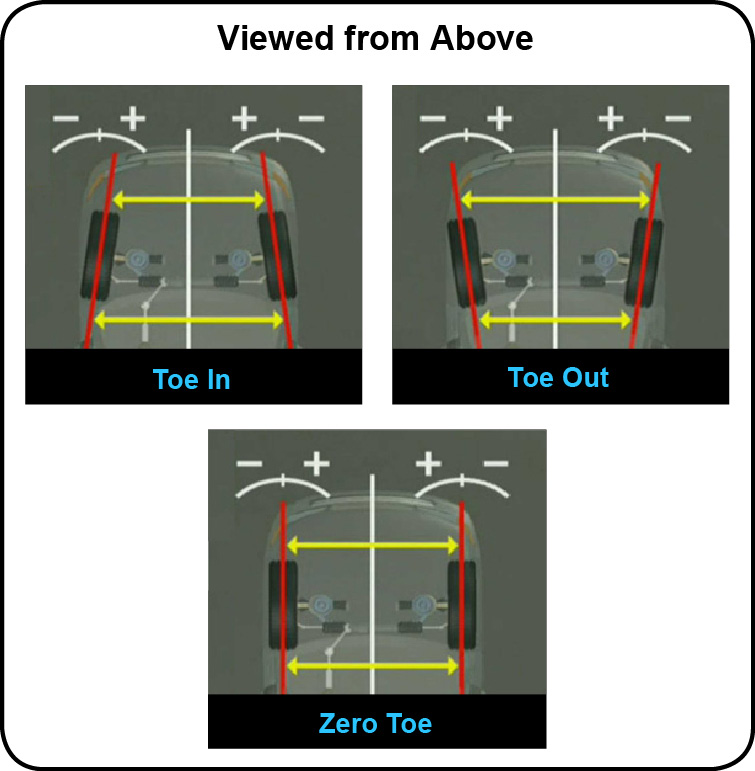
Toe is the inward or outward position of the front of a tire as viewed from above the vehicle. Toe is measured as the distance between the front and rear of a pair of tires. Improper toe may be observed as the tires pointing to the left or right towards or away from the centerline. The toe angle identifies the direction of the tires compared to the centerline of the vehicle. Improper toe conditions cause wandering or drifting, excessive tire wear and steering wheel off center symptoms while driving straight. When you steer a vehicle through a turn, the outside front wheel has to navigate a wider arc than the inside wheel so the inside wheel steers at a sharper angle than the outside wheel. When a vehicle’s toe is incorrect its tires may pull and wear unevenly. Toe is the most critical alignment setting relative to tire wear.
Thrust Angle
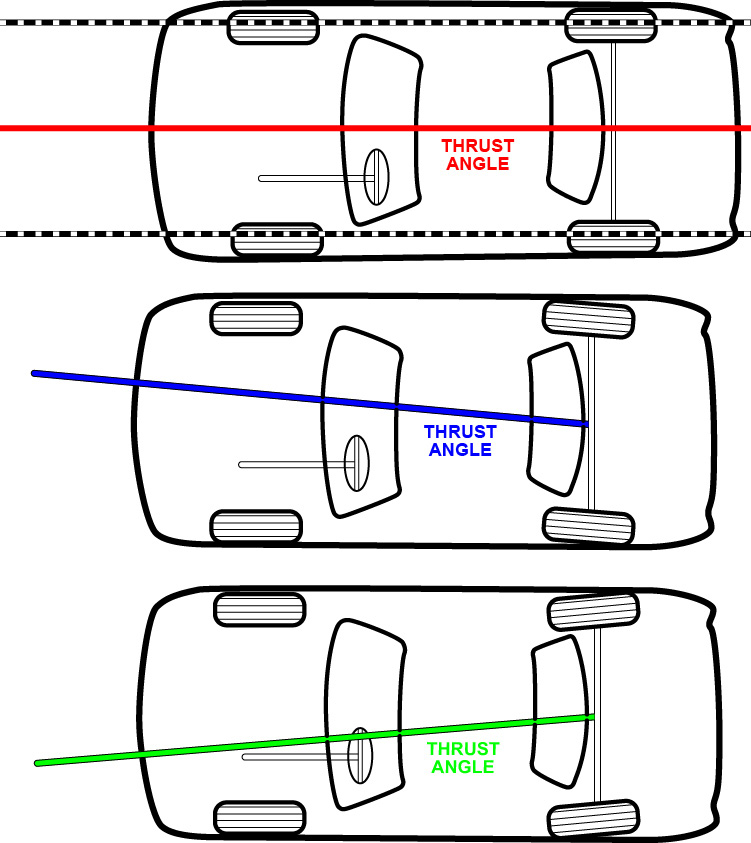
Thrust angle is the direction that the rear wheels are pointing in relation to the center line of the vehicle. If the thrust angle is not zero, the centerlines of the rear wheels will not be parallel to the centerline of the vehicle. Thrust alignment is measured by calculating the difference between the centerline of the front and rear wheels. Improper thrust angle may cause the vehicle to drift or the steering wheel to be off center. During a four-wheel alignment if the rear toe is adjustable, adjust it and then the front toe. If the rear toe is not adjustable, set the front toe to compensate for the thrust angle allowing the steering to be centered.
Four-Wheel Alignment
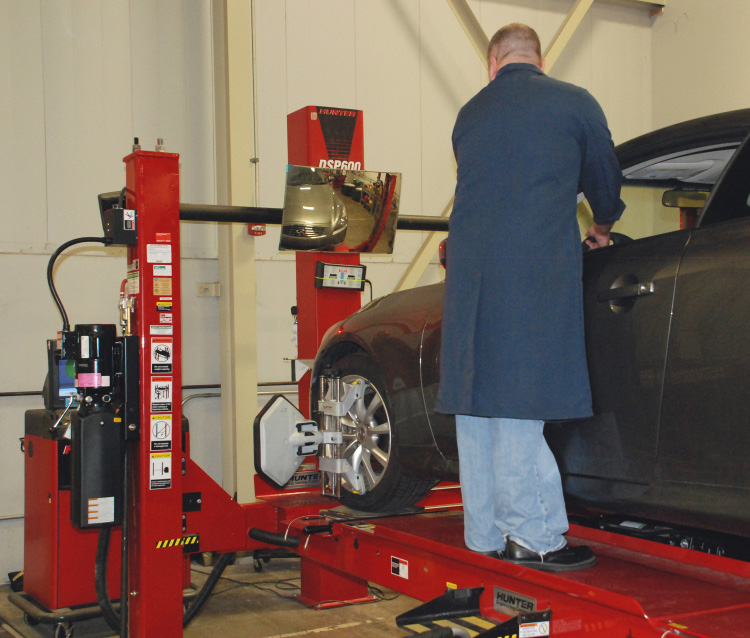
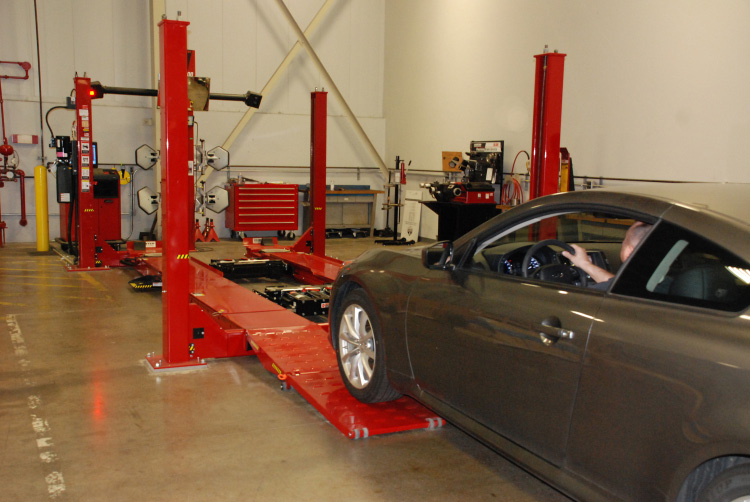
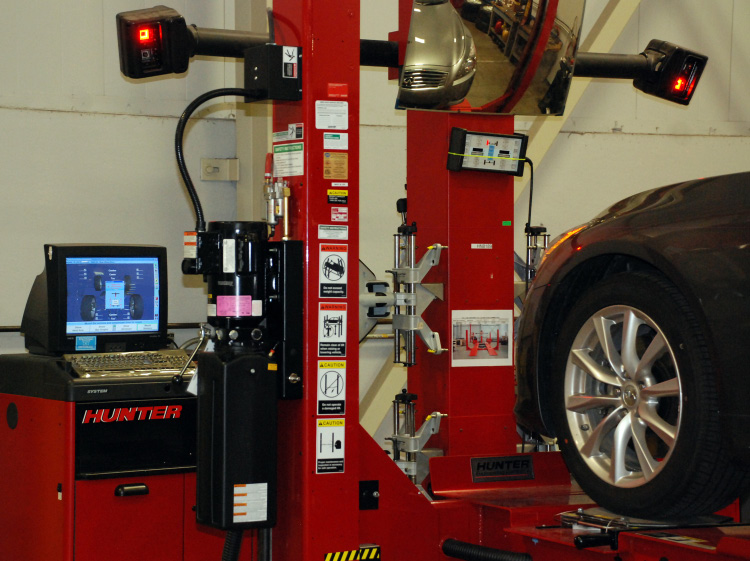
Four-wheel alignment is the appropriate alignment on all vehicles with four-wheel independent suspensions or front-wheel drive vehicles with adjustable rear suspensions. A four-wheel alignment involves adjusting the rear wheels to achieve proper camber, toe and thrust angle, then adjusting the front wheels to the same vehicle centerline. Four-Wheel Thrust Alignment is the recommended alignment procedure to be performed on all Nissan and Infiniti vehicles (with the exception of GT-R). The four-wheel thrust process helps ensure that the vehicle is properly aligned so it will go down the road straight, and helps ensure proper “centering” of the steering wheel. Of course it’s always recommended that you use the right alignment machine. You must use a properly calibrated alignment machine that will give accurate results when performing alignment checks. The alignment rack itself should be capable of accepting any Nissan or Infiniti vehicle. Refer to the Infiniti TECH-MATE Service Equipment Catalog for alignment equipment recommendations.
Preliminary Vehicle Checks and Inspection
Always road test the vehicle before performing alignment procedures. Verify the customer’s concerns, to conditions like pull, drift, or steering wheel off-center. Apply the Steering Wheel Offset Gauge stickers, and a Road Crown Gauge to the vehicle before performing a road test or any wheel alignment procedures. When the road test is completed, remove the Road Crown Gauge, and leave the Steering Wheel Off-Set Gauge in place.
Performing the following preliminary vehicle checks and inspection will help ensure you’re able to properly adjust the alignment on the vehicle:
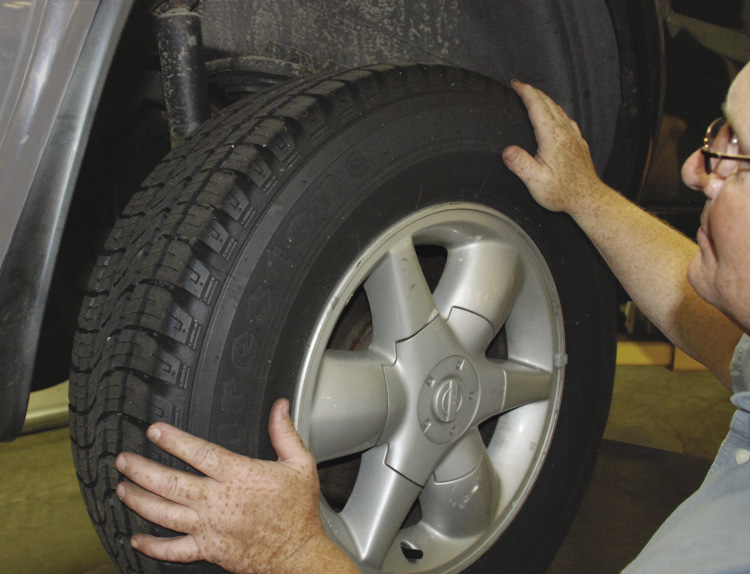
- Tire condition (wear, partial wear, flaws, etc.)
- Road wheel condition (damage and deformation)
- Tire pressure (check and adjust to cold tire specification)
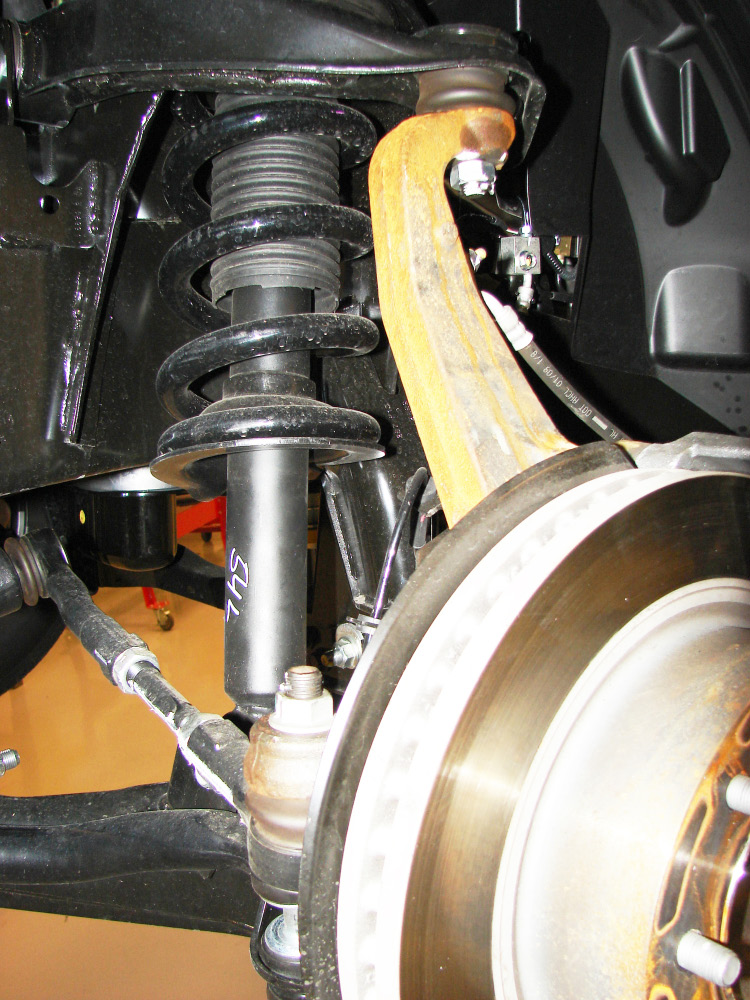
- Inspect suspension components for any visible damage:
- Wheel bearing axial play
- Ball joints of suspension arms
- Shock absorber operation and visual check for oil leakage
- Condition of axle and suspension (check for bushing cracks and slack)
- Vehicle weight – Make sure the vehicle is:
- Empty – no cargo, luggage, or passengers*
- Fuel tank is full
- Engine coolant and lubricating oils are at specified levels
- Spare tire, jack, hand tools, and ensure the floor mats are in their designated positions
Note*: Before aligning a vehicle, it is important for you to understand if the driver typically carries heavy loads in their vehicle, and/or stores materials in their trunk compartments while driving.
Note: Refer to the appropriate Service Manual for specific information about any of the preliminary vehicle checks and inspections.
Alignment Equipment Adjustment Calibration and Documentation
It is important to ensure that the alignment rack and equipment you use at your dealership is properly calibrated, and make certain that it is level. Your alignment equipment should be routinely calibrated in order for it to give accurate readings. Check with your specific alignment equipment manufacturer for their recommended service/calibration schedule. A copy of the yearly alignment machine calibration certification must be held on file in the Service Dept. If any instrument that is part of the alignment machine is dropped or damaged, calibration should be checked immediately.
Important: In order to properly document any warranty alignment claim, a copy of the alignment machine printout showing the BEFORE and AFTER alignment readings MUST be attached to the Repair Order. If you DO NOT attach the BEFORE and AFTER alignment readings item to the Repair Order, the claim may be denied (rejected or charged back).
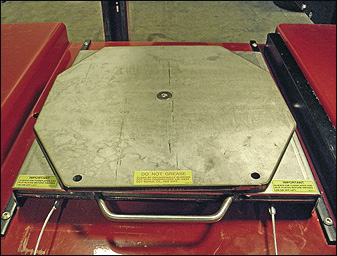
Turn Plates and Slide Plates
Make sure the “turn plates” and “slide plates” are in good working order. The surface of the front turn plates must be level with (the same height as) the rack surface. If height is not the same; have the equipment repaired before performing any alignments.
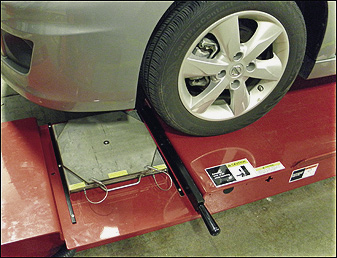
Front turn plates
Make sure the front turn plates DO NOT wobble (no up/down movement) and they operate smoothly (slide and turn) in all directions. If there is any issue with the front turn plate operation – have the equipment repaired before performing any alignments.
Rear slide plates
Make sure the rear slide plates DO NOT wobble (no up/down movement) and they operate smoothly (slide and turn) in all directions. If there is any issue with the rear slide plate operation - have the equipment repaired before performing any alignments.
Note: Make sure the lock pins for the front “turn plates” and rear “slide plates” are in place. The lock pins should remain in place until the caster sweep is performed.
The Alignment Process
Once you’ve ensured your alignment equipment is calibrated and adjusted you’re ready for the alignment process. It’s important to use only the alignment specifications listed in the applicable Service Manual for Nissan or Infiniti vehicles when adjusting the alignment.
Positioning the vehicle
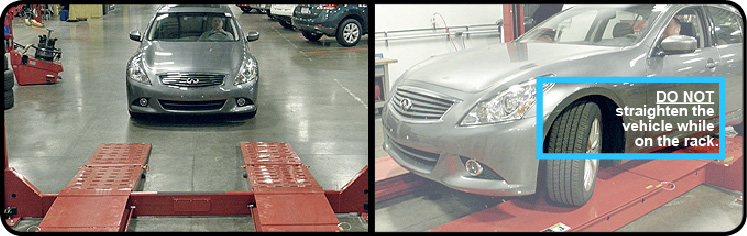
1. Make sure the vehicle is straight on the alignment rack.
- Vehicle must be straight (in line) with the alignment rack before entering the rack.
- DO NOT straighten the vehicle while on the rack.
- If the vehicle needs to be straightened, exit the alignment rack, straighten the vehicle and then re-enter the rack.
- Once the vehicle is straight on the rack, DO NOT turn/center the steering wheel - keep the front wheels straight.
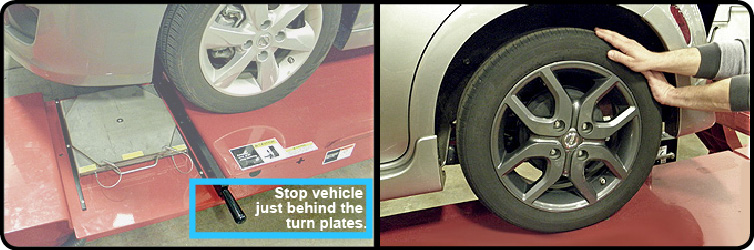
2. Position vehicle on the front turn plates as follows:
- Stop vehicle just behind the turn plates.
- Center the turn plates to the tires.
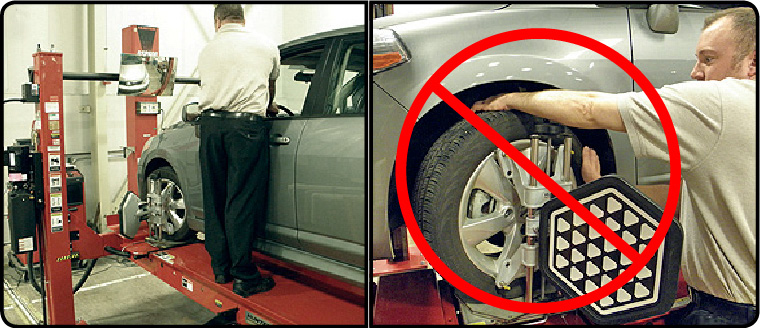
- Move the vehicle onto the turn plates, using the rear tire to roll the vehicle. DO NOT push/pull on the vehicle body.
- Center the front wheels on the turn plates.
- Chock the left rear wheel.
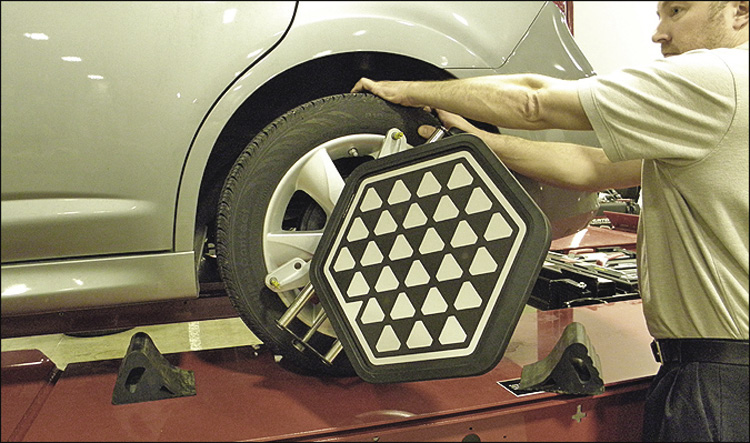
3. Check the target mounts.
- If there is any visual damage (bent, worn, cracked, etc), have the equipment repaired before performing any alignments.
- Make sure the target mounts are properly adjusted and configured.
Note: The target mount example shown is for Hunter “camera type” alignment machines. Follow the operation manual for your specific equipment.
4. Make sure the targets are mounted correctly.
- Mount the top claws first.
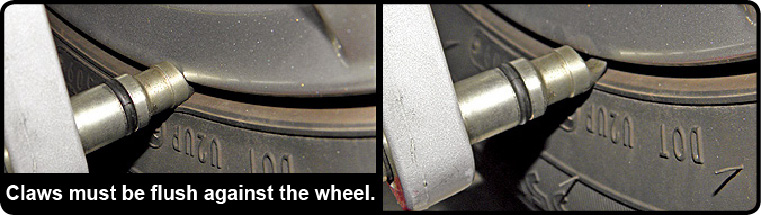
- Claws must be flush against the wheel.
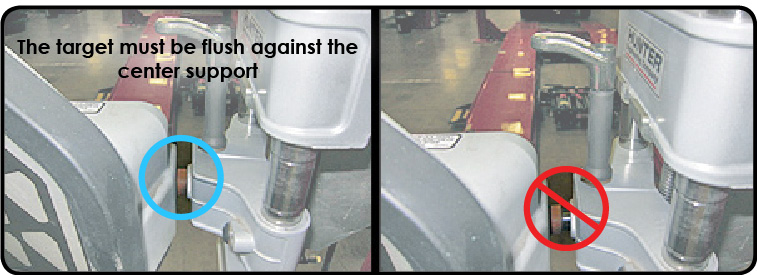
- Target must be flush against the center support.
Important:
- Make sure the targets are positioned with the arrow UP or level.
- Once you have set the target position, DO NOT reset it at anytime during the alignment process.
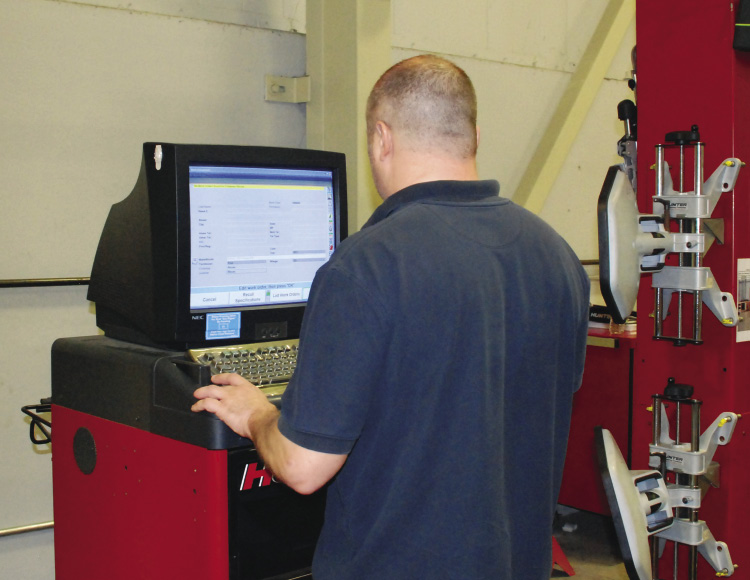
5. Begin the alignment procedure.
- Follow all of the instructions for your particular equipment.
- Refer to the Service Manual for alignment specifications.
If your equipment requires “rolling compensation”, follow these additional tips:
- DO NOT push or pull on the vehicle body.
Important: After performing “rolling compensation”, DO NOT reset the target position.
When performing “caster sweep”, follow these tips:
- Apply the brakes as shown.
- Start the engine to allow brake boost.
- Turn the engine OFF,
- Remove all lock pins—front “turn plates” and rear “slide plates”.
- Make sure the bridge plate will not interfere with movement of the turn plate. Put the bridge in the down position.
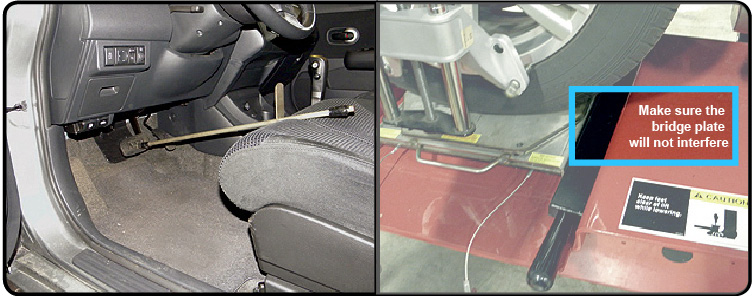
- Perform caster sweep by turning the steering wheel from outside the vehicle. DO NOT push/pull on the tire to perform the caster sweep.
6. Make sure the steering wheel is centered when performing toe-in measurements and adjustments.
Important
Hunter Alignment Machine
- WinToe® eliminates the effect of lash in the steering system. If you are using a Hunter alignment machine equipped with the WinToe® Alignment Adjustment System:
- There is no need to lock the steering wheel. The WinToe® system is not affected by steering system movement during the adjustment process.- - Bumping the tire or re-centering the steering wheel when adjusting “near frozen” tie rods is not necessary. This makes the adjustment process faster and easier.
Always road test the vehicle after every alignment to make sure the steering wheel is “centered” when driving on a straight flat road. An off-center steering wheel is a common complaint customers have after a wheel alignment is performed.


Note
John Bean alignment machine
- If you are using a John Bean alignment machine equipped with EZ Toe:
- There is no need to lock the steering wheel. The EZ Toe system is not affected by steering system movement during the adjustment process. This software routine is an improved method of setting front toe, making it easier to obtain a centered steering wheel.
- With EZ Toe, it is possible to adjust toe with the steering wheel turned at any angle left or right. This is helpful when setting toe on engine wall mounted rack and pinion units.
After you have checked and adjusted vehicle alignment:
To properly document any warranty alignment claim, a copy of the alignment machine printout showing the BEFORE and AFTER alignment angle readings, and a copy of the alignment equipment calibration certification MUST be attached to the Repair Order.
Summer 2011 Copyright© 2011 by Nissan North America, Inc.