
Vehicle Exterior
Exterior Lighting
The JX35 has Automatic ON/OFF High Intensity Discharge (HID) bi-functional xenon headlights which have an automatic-on headlight function that illuminates the headlights during a rainy condition after 4 wiper passes. Many states now require headlights be illuminated in rainy conditions. The JX is equipped with front fog lights that are integrated into the front fascia.
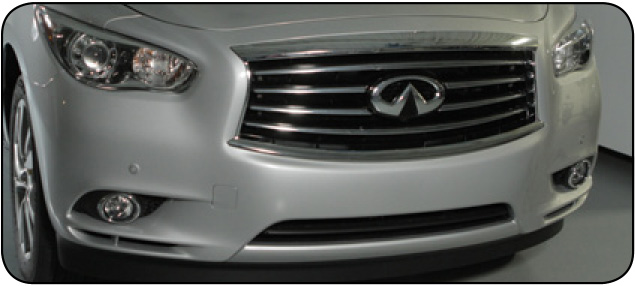
Xenon Headlights
The Infiniti JX is equipped with sculpted bi-functional Xenon headlights that project a commanding aura. This lighting system includes Smart Beam technology, a system that intuitively adjusts the high beams to maximize visibility.
When the xenon headlight are initially turned ON, its brightness or color varies slightly. However, the color and brightness will soon stabilize. They also produce a high temperature and care should be taken when replacing these lights.
Enhanced Auto Headlights
The JX35 has adopted an improved two-stage automatic-on headlight function that:
• Stage 1: In lower light situations (during the day), the headlights illuminate automatically, but the interior gauges remain in daytime mode.
• Stage 2: In late evening/night conditions, the headlights illuminate and gauges revert to nighttime mode lighting.
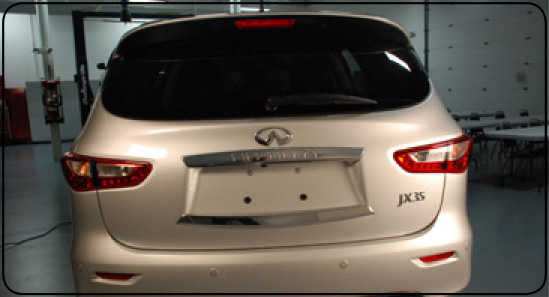
Rear Lighting
The rear lighting includes LED tail lights, brake lights and a Center High-Mounted StopLight (CHMSL). The LED lights use less electricity while emitting more light than a regular incandescent light bulb. The CHMSL is integrated into the rear spoiler.
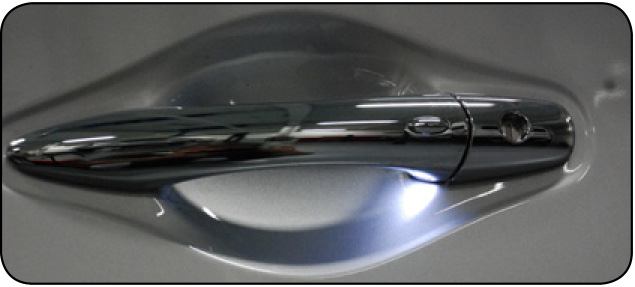
Welcome Lighting
Welcome lighting has been added to the door handles of the JX. This feature can be turned ON or OFF by using the Vehicle Settings menu. The JX welcome light function operates when the Intelligent Key is within the outside key antenna detection area. When the welcome lighting operation is performed, the BCM turns on the interior room lamp, map lamp, foot lamp, personal lamp door handle lamp and puddle lamp.

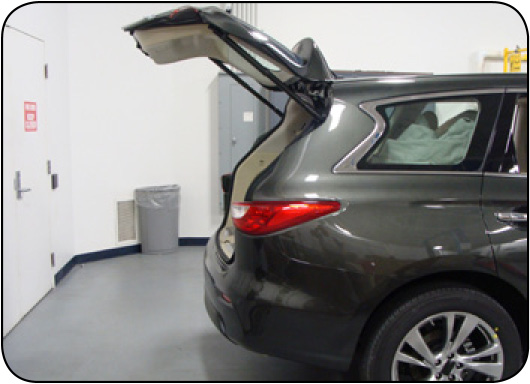
Power Liftgate Feature Operation Function
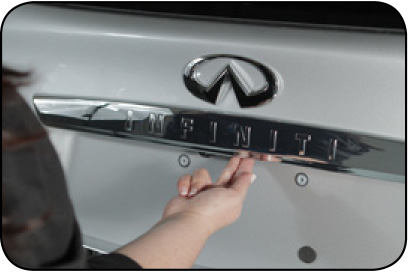
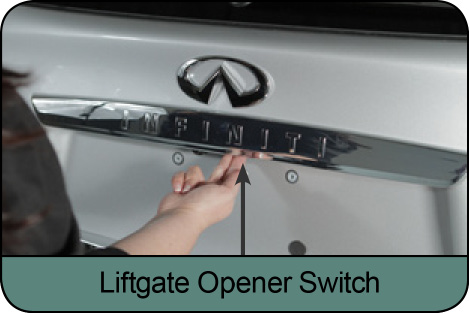
The power liftgate open feature can be activated by the switch on the keyfob, the instrument panel switch and the liftgate request switch.
Note: To open, close, or reverse the power liftgate, the shift selector must be in P (Park). Also, the power liftgate will not operate if battery voltage is low.
Power-Open
The power liftgate can automatically move from the fully closed position to the fully open position in approximately five to eight seconds. The hazard lights flash and a chime sounds to indicate the power open sequence has been started.
• The liftgate can be opened by the instrument panel switch, liftgate request switch, and the keyfob even if the vehicle is locked. Once the liftgate is closed, its lock will align to the vehicle's lock or unlock status.
• The keyfob button must be held for approximately 0.5 seconds before the liftgate opens.
• The liftgate must be unlocked to open it with the liftgate opener switch.
A warning chime will sound if the shift selector is moved out of P (Park) during a power open operation.
Power-Close
The power liftgate can move automatically from the fully open position to the closed position. When the liftgate reaches the closed position, the cinching motor engages and pulls the liftgate to its latched position. Power close takes approximately seven – 10 seconds. The power close feature can be activated by the liftgate button on the keyfob, the instrument panel, and the liftgate opener switch. The hazard lights flash and a chime sounds to indicate the power close sequence has been started. If the liftgate opener switch is activated while the cinching motor is engaged, the cinching motor will disengage and release the latch.
The switch on the liftgate can only be used to close the liftgate if the power liftgate main switch is in the ON position.

Note: The keyfob liftgate button must be held for 0.5 seconds before the liftgate closes.
Reverse
The power liftgate will reverse direction immediately during power open or power close if the keyfob, instrument panel or liftgate switch is pushed and/or if the liftgate opener switch is pushed. A chime will sound to announce the reversal.
Auto Reverse
If an obstacle is detected during power open or power close, a warning chime will sound and the liftgate will reverse direction and return to the full open or full close position. If a second obstacle is detected, the liftgate motion will stop and the drive motor will disengage. The liftgate will enter manual mode.
A pinch strip is mounted on each side of the liftgate. If an obstacle is detected by a pinch strip during power close, the liftgate will reverse direction and return to the full open position.
Note: If the pinch strip is damaged or removed, the power close function will not operate.
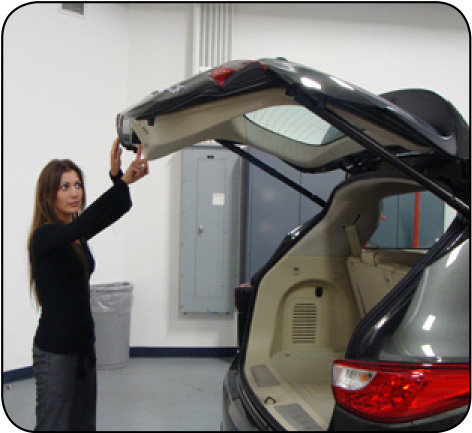
Manual Mode
If power operation is not available, the liftgate may still be operated manually. Power operation may not be available even if the power liftgate main switch is in the ON position: if multiple obstacles have been detected in a single power cycle, or if battery voltage is too low.
To open the liftgate manually, press the liftgate opener switch and lift the liftgate.
To close, lower and push the liftgate down securely.
Safe Mode
If the liftgate gas stays loose pressure, the power liftgate safe mode is activated. When the safe mode is activated, the liftgate slowly closes. A continuous warning chime sounds until the liftgate is in the fully down position. Then the liftgate will be pulled to the closed and latched position by the cinching motor. The power liftgate cannot be opened using the switches while the power liftgate is in safe mode. The auto reverse function remains active while the liftgate is closing in the power liftgate safe mode.
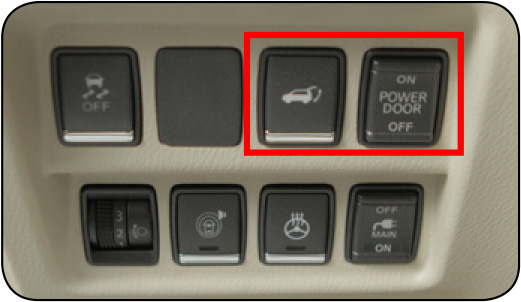
Power Liftgate Main Switch
The power liftgate operation can be turned ON or OFF by the power liftgate main switch on the instrument panel. When the power liftgate main switch is pushed to the OFF position, power operation is not available by the power liftgate switch on the liftgate or the liftgate instrument panel switch.

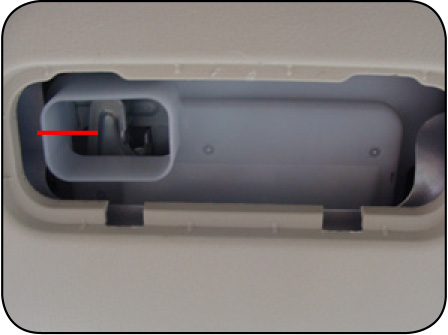
Power Liftgate Release
If the liftgate cannot be opened with the instrument panel switch, liftgate opener switch or keyfob due to a discharged vehicle battery, follow these steps:
1. Remove the finisher cover on the inside of the liftgate.
2. Move the levers as indicated to open the lift gate.
Liftgate Middle Stop and Garage Mode Function
The power liftgate on the JX allows users to adjust how high the liftgate opens.
Garage Mode
Garage mode is a convenient feature for people who routinely park in a garage with a low ceiling, or who have difficulty reaching high enough to grasp the liftgate when it's fully open. This feature allows setting the liftgate to open only to a user-selected height.
Use the liftgate opener switch on the outside of the liftgate to open or stop the liftgate.
Use the liftgate switch on the bottom of the liftgate to set a new opening height.
To activate this function:
• Park the vehicle in a location where the liftgate can open to its highest point. Make sure the liftgate is closed and the shift lever is in Park (P).
• Make sure the power liftgate main switch on the instrument panel is in the ON position, and then press the liftgate opener switch on the outside of the liftgate and let the liftgate open fully.
• Manually move the liftgate to the height where you want it to stop. Then, push and hold the switch on the lower part of the liftgate for approximately five seconds or until you hear three beeps.
The liftgate will now be set to only to the height selected. To reset the height, simply position the liftgate to the new height, and then press and hold the liftgate switch on the lower portion liftgate again for approximately five seconds or until you hear three beeps.
Middle Stop
The middle stop function allows users to stop the liftgate when it is in motion.
Make sure the power liftgate main switch on the instrument panel is in the ON position. Press the liftgate opener switch on the outside of the liftgate, and then press it again when the liftgate reaches the position you want. This stops the upward motion of the liftgate. Middle stop doesn't set a new opening limit. The liftgate will still open fully when the liftgate opener switch on the outside of the liftgate is pressed. It will fully close when the liftgate switch on the lower portion of the liftgate is pressed.
Maintenance
Hinge Mounting
If you need to replace the liftgate hinge for any reason: The mounting location of the liftgate hinge is in the roof ditch versus the traditional location of the roofs water trough. Removing the hinge from the body requires the roof ditch molding to be removed first so you can access the attachment nut. To access the second attachment nut, the headliner needs to be dropped to be able to access the clearance hole.
Note: The hinge must be resealed after replacement.
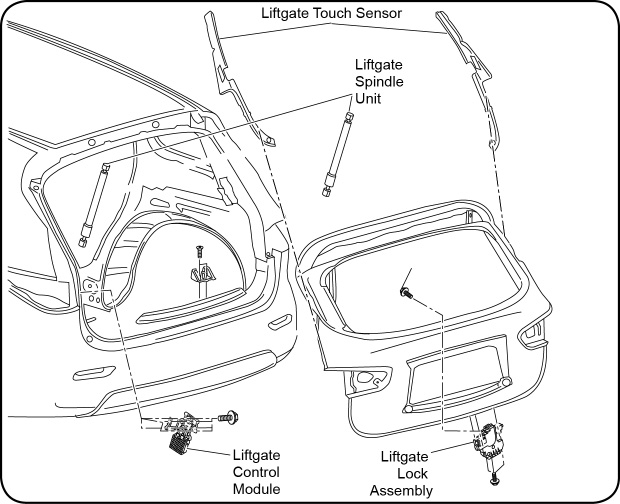
Sensor-Touch Liftgate Right-Half/Left-Half
The automatic liftgate system performs the automatic open/close operation by operating the instrument panel liftgate switch, the liftgate switch, the liftgate opener switch or the keyfob liftgate button.
Sensor-touch pinch strips are mounted on each side of the liftgate.
Note: To remove the sensor strip, its harness connector needs to be disconnected. To access this connector, the bottom door finisher must be removed.
Right Half and Left Half Touch Sensors
For the liftgate system to work, resistance between terminals must read 1000 Ohms when the sensor is not activated for the liftgate system to operate and less than 400 Ohms when the sensor is activated. The pinch strip sensors are activated when pushed with a force of approximately 2-20 N.m (1-15 ft-lb).
Outside Mirrors
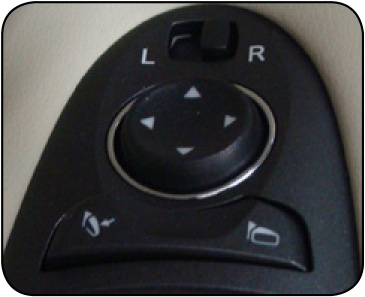
The outside mirrors come standard as power folding and heated mirrors. This enables the driver to fold the mirrors in when going through a car wash or when getting out of the vehicle that's parked in tight spaces. The switch is located by the power mirror switch on the door. These mirrors are also equipped with a de-ice feature, which turns ON and OFF with the rear defogger switch. If one of the mirrors are operated manually or bumped, the mirror body can become loose at the pivot point. To correct electronic mirror operation, cycle the mirrors by pushing the "CLOSE" switch until completely closed, and then push the "OPEN" switch until the mirrors are in the open position.
Reverse tilt-down feature
Outside mirrors with the premium package have a reverse tilt-down feature that can turn the selected outside mirror surface downward to provide better rear visibility close to the vehicle.
When the ignition switch is in the ON position, turn the outside mirror control switch to the left or right position. Only one mirror can be selected at a time. Move the shift selector to R (Reverse). The selected mirror will turn downward.
The selected mirror will return to its original position when any of the following has occurred:
• The shift selector is moved to any position other than R (Reverse).
• The outside mirror control switch is set to the neutral or center position.
• The ignition switch is placed in the OFF position.
Note: Outside mirrors equipped with side cameras require calibration if they're disassembled or repaired.