Altima Armrest Removal Service Tip
If the armrest on the driver or passenger-side front doors on a 2007-2012 Altima has to be removed or replaced for any reason, perform the following procedure to remove the armrest without damaging the armrest fastening points. To help eliminate unintended damage to the armrest when performing repairs to the door, door finisher or door components, the following removal and installation tips will be useful.
![]()
If the armrest is not removed properly, the door armrest finisher clips may be damaged, making it hard to properly reinstall the part and have the pawls grip properly. If the armrest is removed or installed incorrectly, damage to the armrest clips or door finisher may result.
Note: A good practice during colder weather is to allow the vehicle’s interior to warm up to room temperature before removing the front or rear armrest. This helps to reduce the possibility of clip damage.
Armrest Removal Process
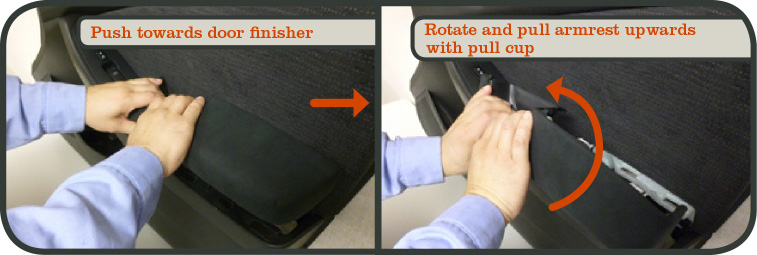
To service or replace a driver or passenger-side front door armrest, you’ll need to perform both a pushing and pulling-up action on the door armrest in order to free it and move it away from its lower and upper fastening points.
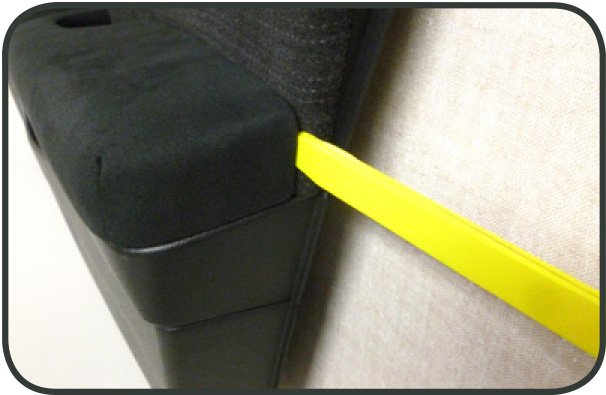
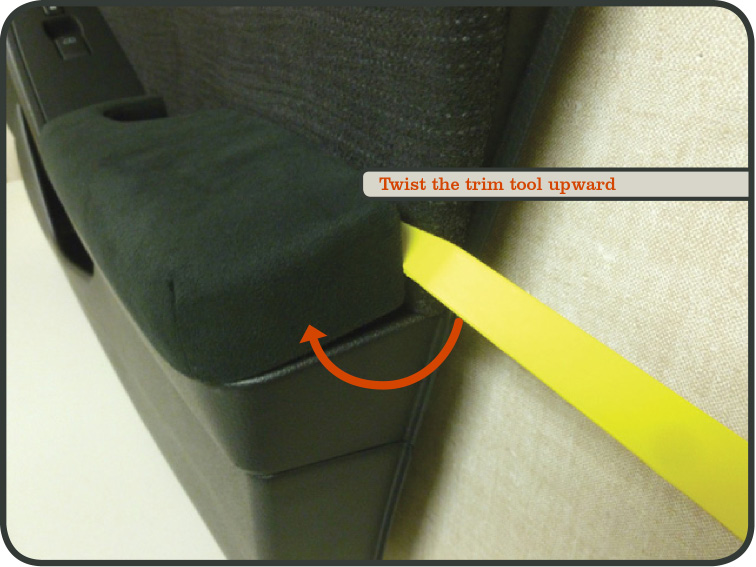
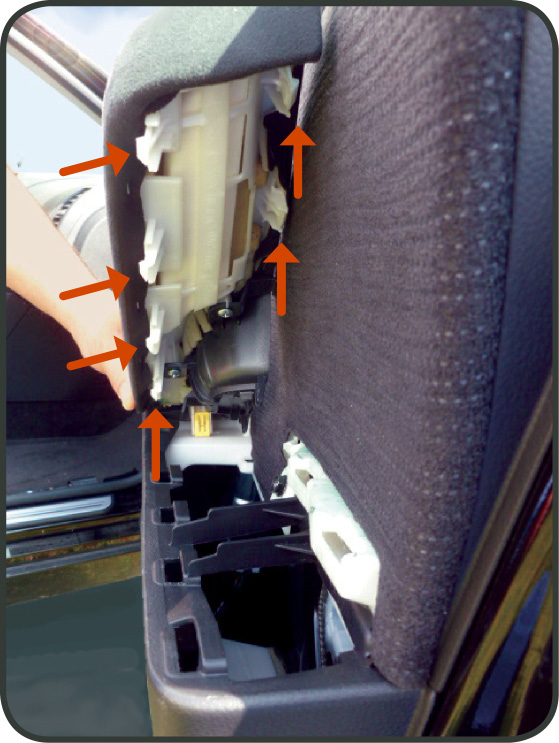
Insert the trim tool between door finisher and armrest at upper-rear center.
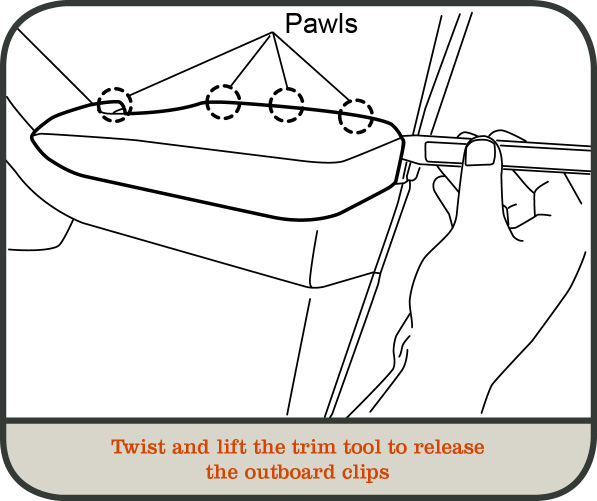
Insert the trim tool at next clip locations, and follow the same twisting procedure, gently lifting to release inboard clips.
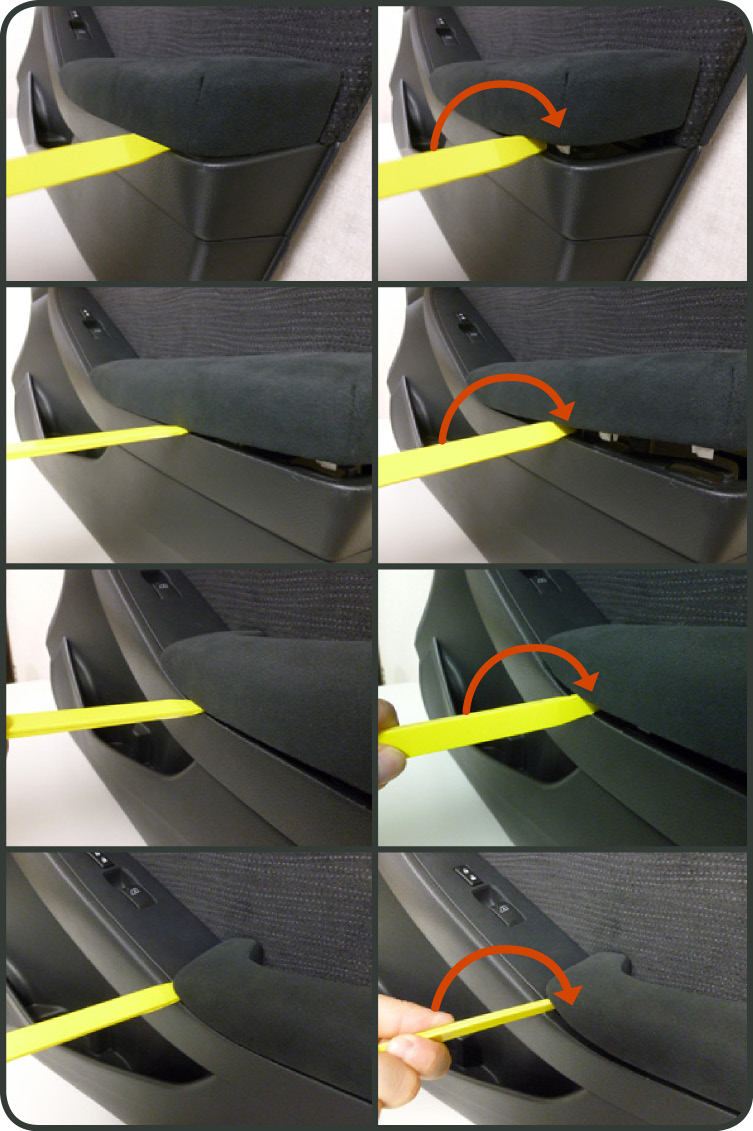
To remove the remaining clips, firmly grasp the pull cup, and then push the armrest back toward the door finisher while simultaneously rotating it upwards.
The armrest can now be removed without breaking the locking clips or alignment tabs.
Note: Performing the pushing/pulling action is required to release the armrest from the fastening points. This action will allow you to remove the armrest without damaging the armrest fastening clips.
Armrest Installation Process
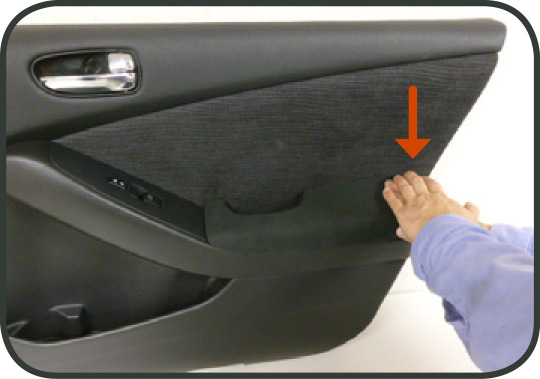
Lower the door armrest into position, then push the armrest down on the front, center and rear so it can affix to the fastening points.
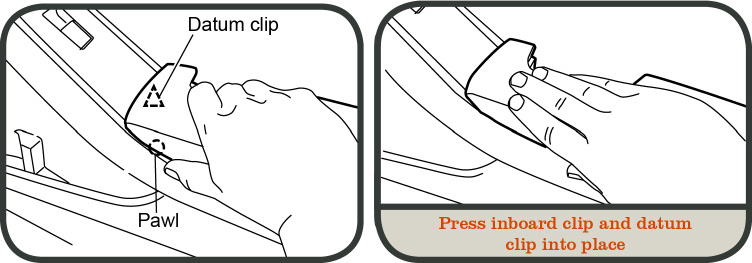
Set armrest in position on back of door finisher. Seat the yellow datum clip by pushing directly down on front end of armrest while listening for the “click” when it engages.

Push directly down on center of armrest to engage the clips. Listen for the “click” noise when they engage.
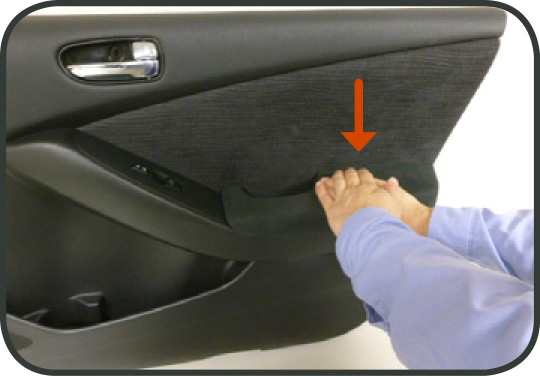
Next, push down on the rear corner of armrest to engage the back clips. Listen again for the “click” noise to be sure that the clips have properly engaged the fastening points.
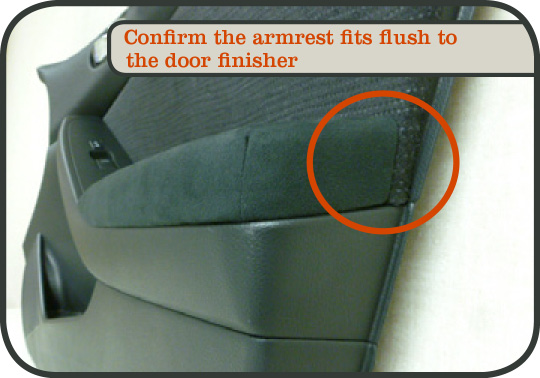
Confirm that the part is installed correctly by pulling upward on the armrest. Also, confirm that the armrest has a flush fit with door finisher edge.
Tip - If any clips have become broken during servicing, it may cause a loose component fit condition during customer use. If this condition occurs, armrest replacement may become necessary.