
The quality and design of the 2013 vehicle’s interiors have been built to the highest fit specification. If it becomes necessary to make interior repairs on an applicable vehicle, the following are some quick tips on the care and finesse required for finisher removal and installation.
Removing a Front Door Pull Handle Outer Finisher
If the front door armrest on the driver or passenger side front door of a 2013 Altima (L33) has to be removed or replaced for any reason, perform the following procedure to remove the front door pull handle outer finisher. To service or replace a front door pull handle or armrest you’ll need to know the best locations to insert the finisher tool in order to release the finisher clips. Care must be taken to help ensure you don’t damage the finisher, or break the clips.
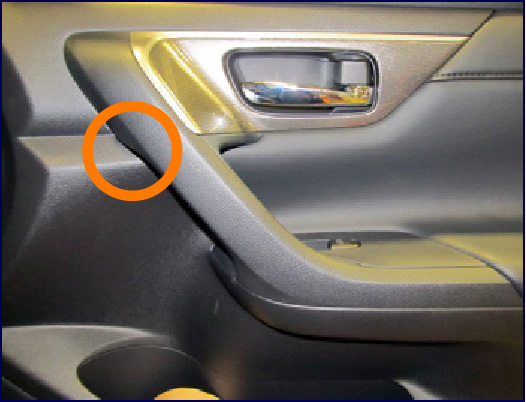
Gently insert the finisher tool at the position indicated to release the clips.
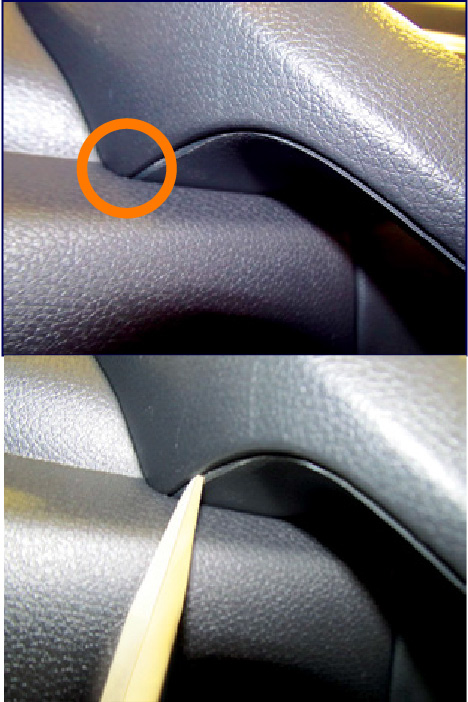
Lift the finisher tool under the front door pull handle outer finisher to disengage the clip.
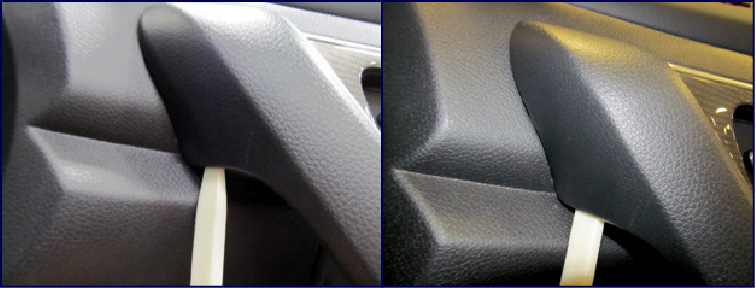
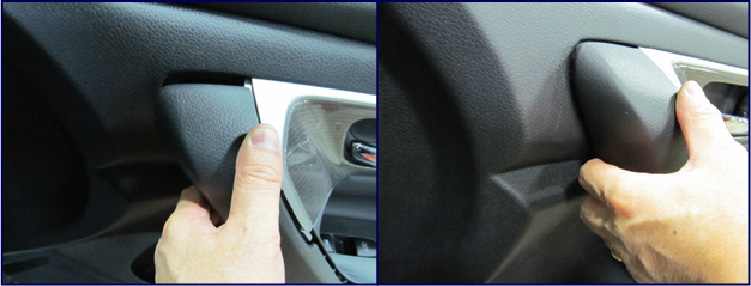
Push the trim tool up under the door pull handle outer finisher, and then pry the trim tool toward you to release the finisher from the upper fastening point.
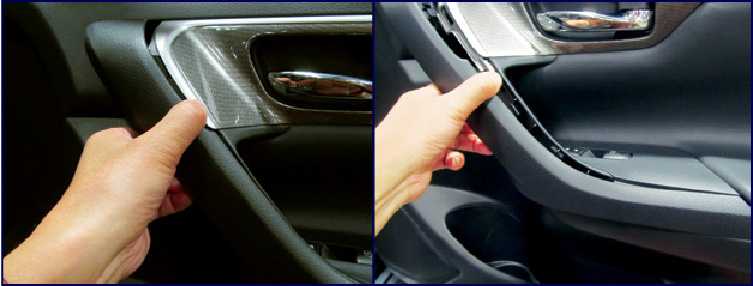
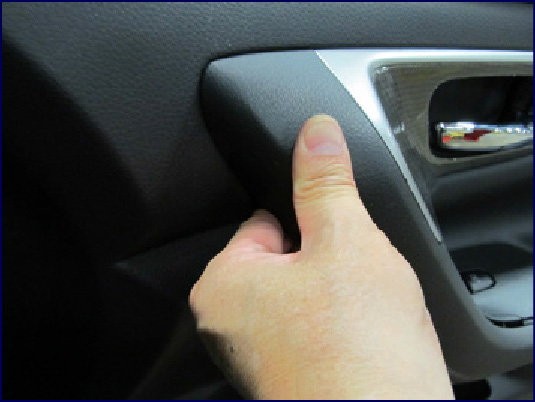
Grasp the front top portion of the door pull handle outer finisher and pull toward you.

Once you have partially pulled up on the front of the door pull handle outer finisher, pull the finisher towards you at the top and then pull in the middle to disengage the clips.
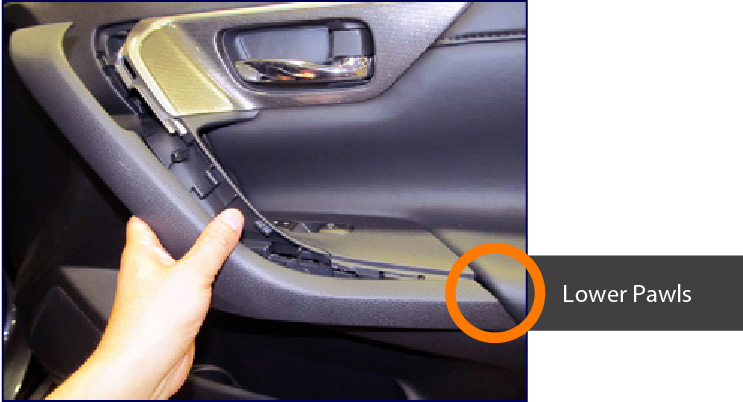
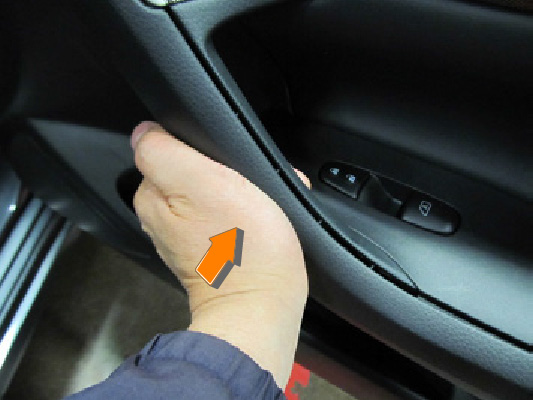
NOTE: Pull the front door pull handle outer finisher at the top and at the middle carefully as you release the finisher to make sure not to break the lower pawl fastening points.
Pull the pull handle finisher toward the front of the vehicle while disengaging the lower pawls.
Installing a Front Door Pull Handle Outer Finisher on the 2013 Altima (L33)
To successfully reinstall the front door pull handle outer finisher, take care when inserting the pawls and engaging the clips to ensure they’re not damaged.
Lower the door pull handle outer finisher into position and push in toward the door to insert the lower fastening pawl.
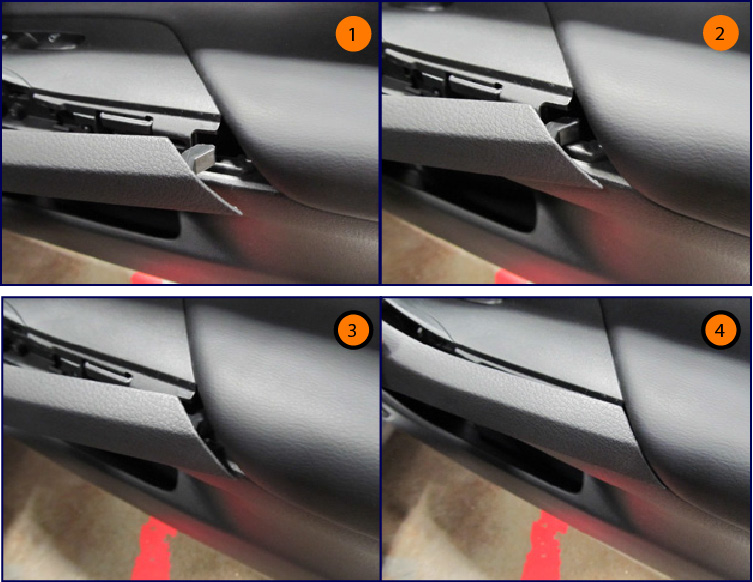
Place the front of the door pull handle outer finisher in position at the top to engage the plastic clip at the fastening point.
Push in and down on the front of the door pull handle outer finisher until the plastic clip pops into the front upper clip fastening point.
Push in on the center of the front door pull handle outer finisher to securely engage the rest of the clips.
Assist Grip Finisher Removal
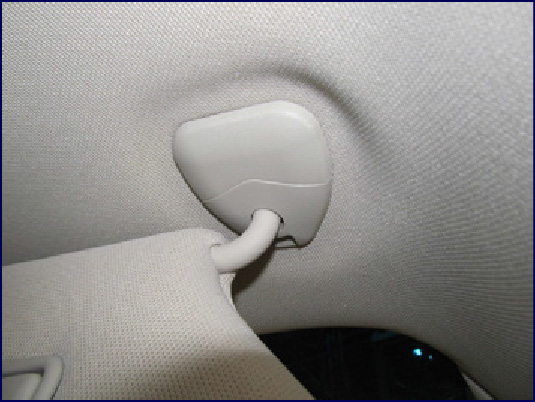
If you need to remove a headliner for any reason, from an Altima (L33), the assist grip finisher will need to be removed. Perform the following procedure to remove the assist grip finisher cap without damaging the headlining or marring the finisher.
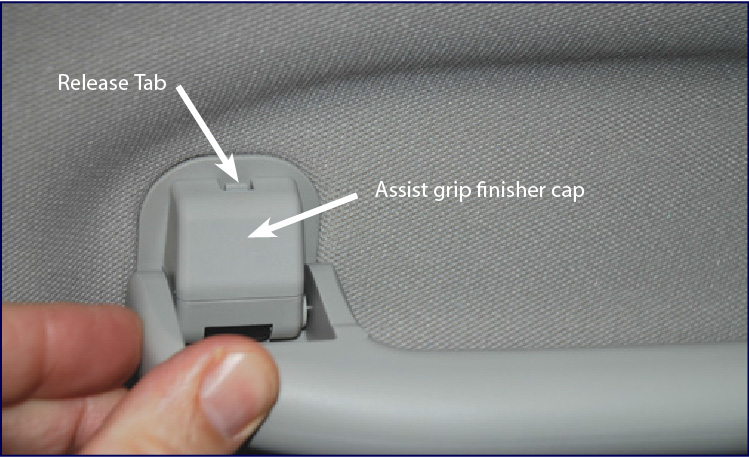
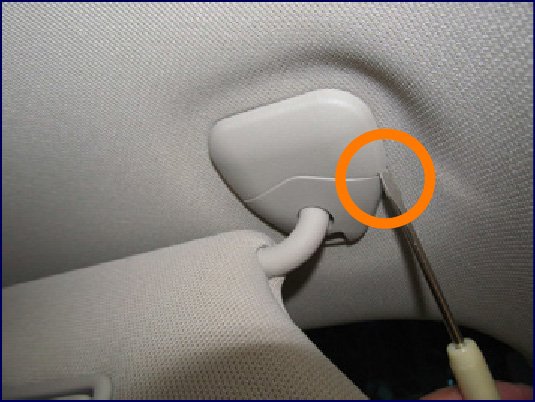
Carefully insert a small flat blade screwdriver or use a suitable small flat trim tool to release the cap tab at the point shown below in the photo. Be careful not to damage the headliner or the assist grip finisher cap.
Grasp the assist grip finisher handle and rotate the handle downward, then push the small tab toward you with the flat head screwdriver.
Pull the finisher cap upwards while continuing to push the tab toward you with the flat head screwdriver.
Lift the cap finisher up off of the grip handle.
Lift the assist grip handle up just a small amount to remove it off the bracket tabs while pulling it outward to release it.
Remove the assist grip handle.
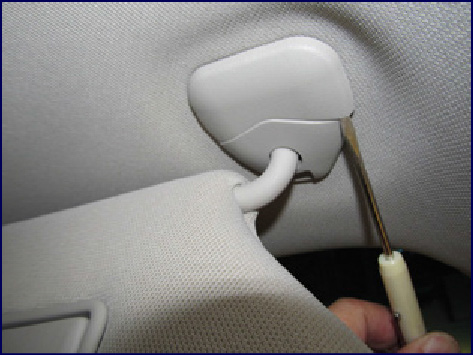
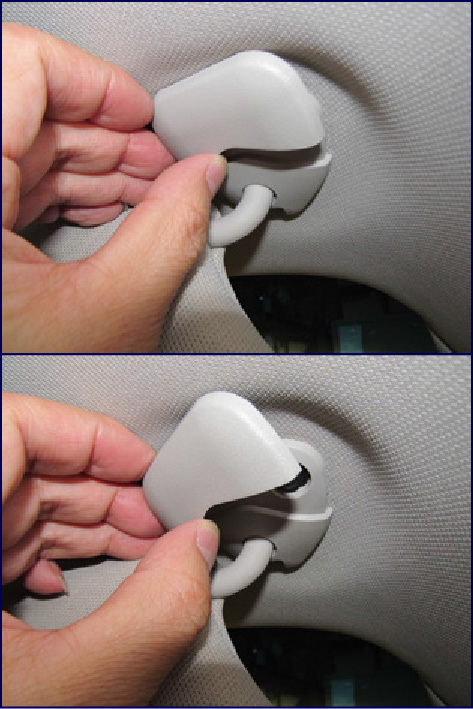
Sun Visor Headliner Cap Finisher Removal
If you need to remove a headliner for any reason from an Altima (L33), Pathfinder (R52), or JX (L50) vehicle; the sun visor and bracket will need to be removed. Perform the following procedure to remove the sun visor bracket finisher cap without damaging the headliner or marring the finisher cap.
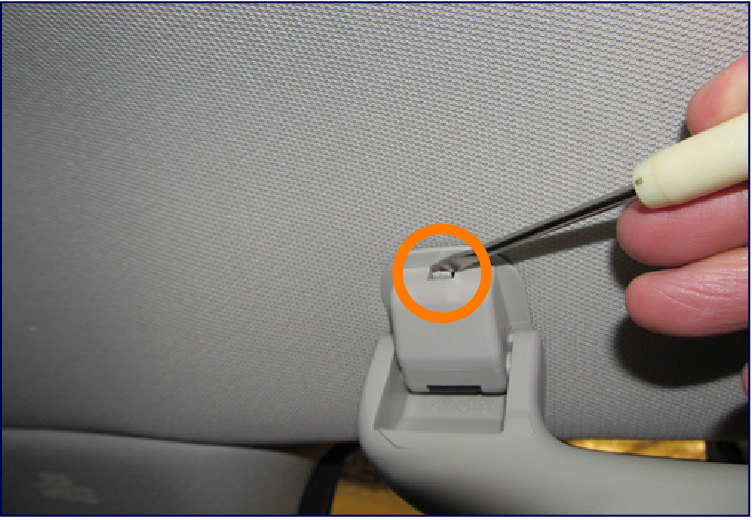
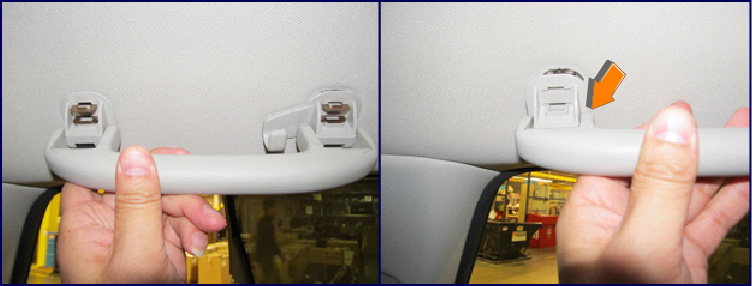
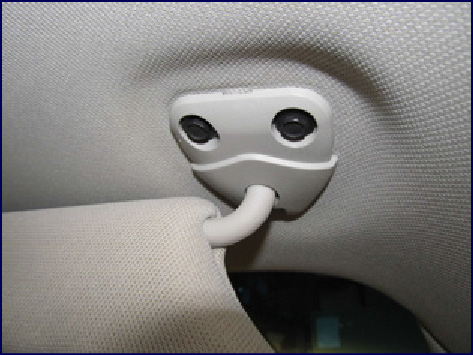
Carefully insert a small flat blade screwdriver (or a suitable, small finisher tool) at the end of the finisher cap near the headliner. Take care not to damage the headliner or the finisher cap surface.
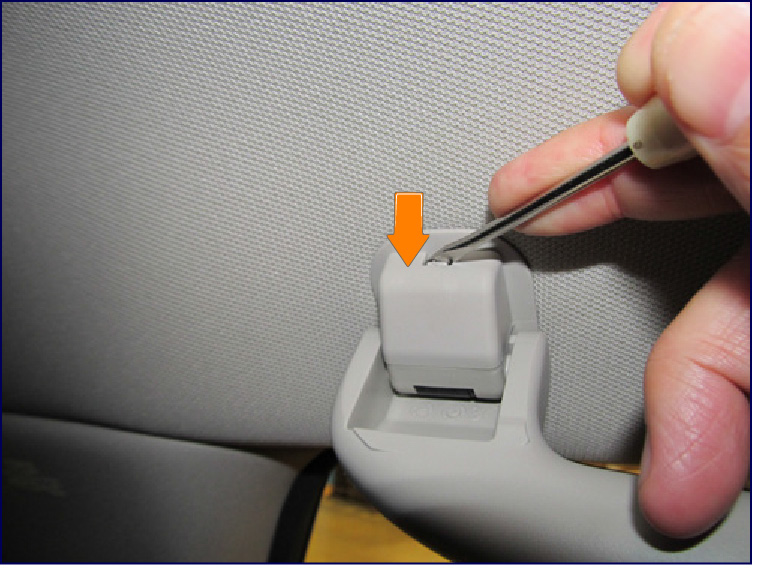
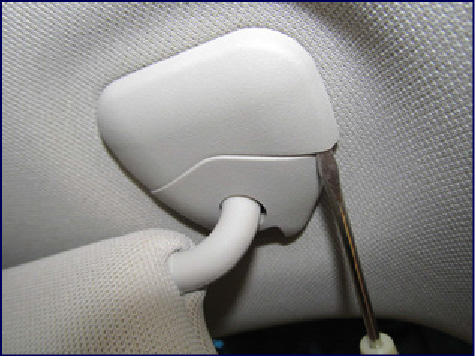
Lift the corner of the sun visor headliner cap finisher with the flat blade screwdriver, gently pull up and back.
Continue pulling with the flat blade screwdriver outward and toward you.
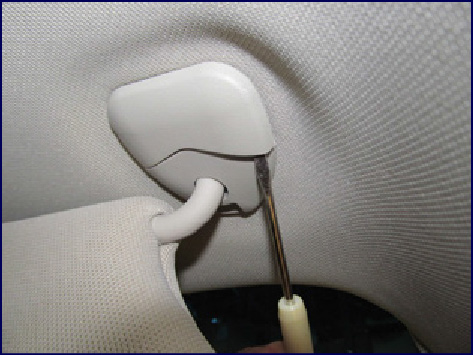
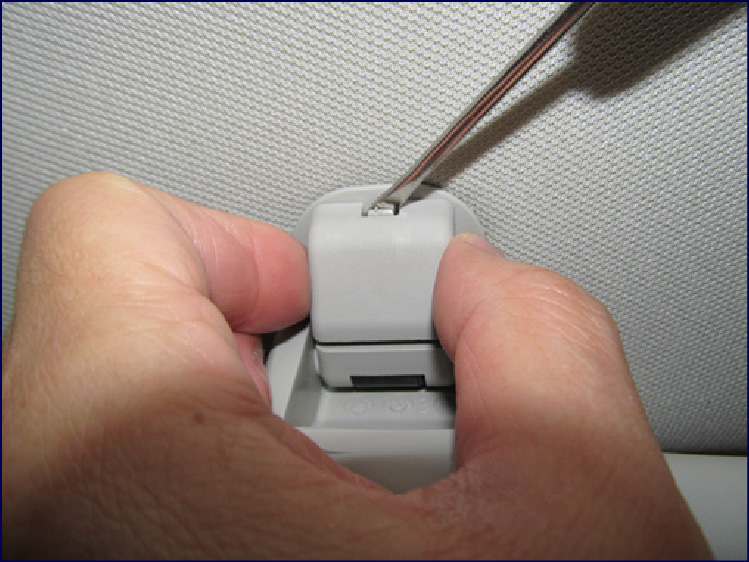
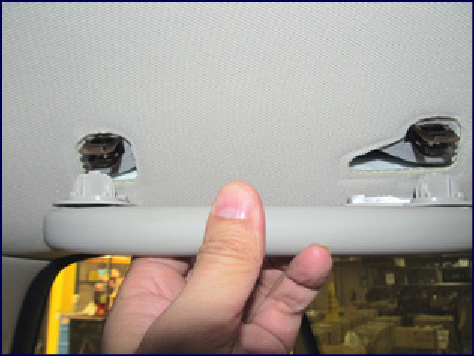
Now, begin to lift the corner of the sun visor headliner cap upward.
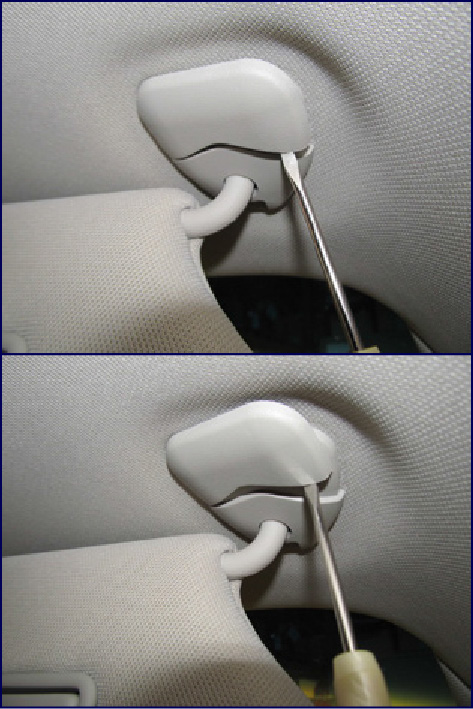
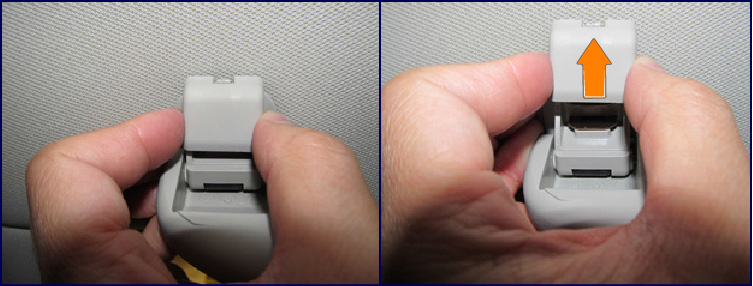
Grasp the corner of the sun visor headliner cap finisher and pull it up and away from the bracket.
You can now remove the sunvisor bracket from the headliner.
Luggage Side Seat Belt Clip Finisher Available
If you need to replace a luggage side seat belt clip on a Pathfinder (R52), or a JX (L50) vehicle, they are available as service parts. Use a small trim tool or wrap a flat head screwdriver with a shop cloth or vinyl tape to protect the panel finisher from damage. Lift the edge of the seat belt clip from the side to remove it from the rear panel finisher.

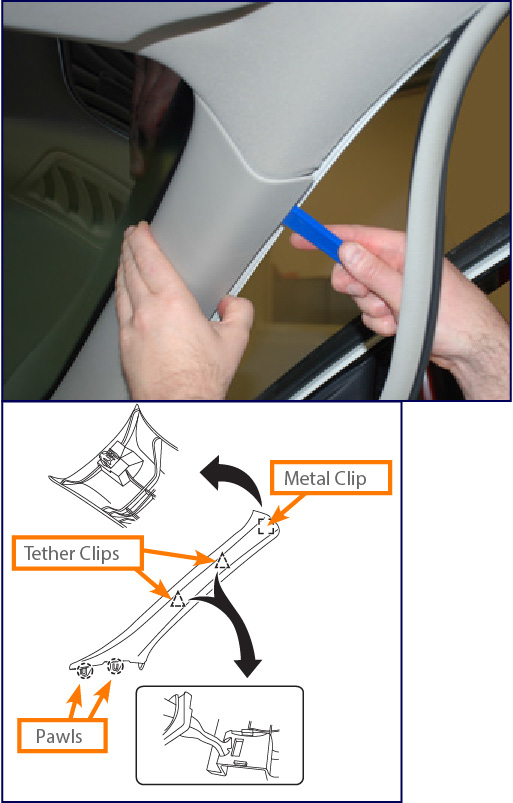
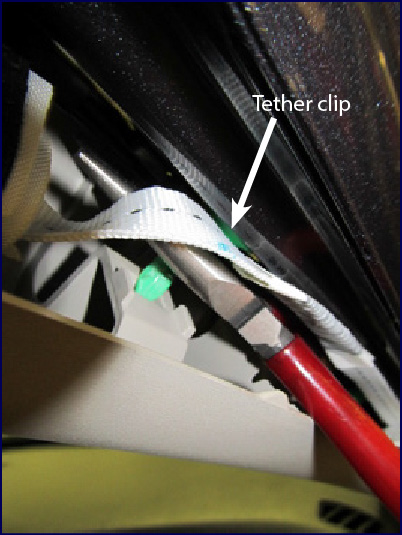
Front Pillar Finisher Removal and Tether Clip Replacement
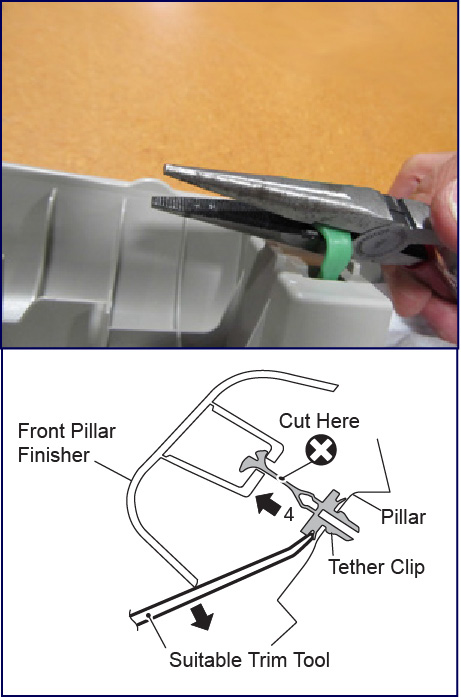
If you need to remove a front pillar trim finisher for any reason from an Altima (L33), Pathfinder (R52), JX (L50), or Maxima (A35) vehicle, perform the following procedure. To remove the front pillar finisher, you wil need to use a suitable tool like your trim tool spatula or a flat blade screwdriver to release the metal clips and pawl. In addition, you will need a snip tool or some needle nose pliers (with a cutting edge) to cut and remove two tether clips. These tether clips are not reusable and are available as a service part. You will need to replace them to reinstall the front pillar finisher.
NOTE: If using a small flat blade screwdriver, wrap the tip with a cloth when disengaging the metal clip and pawl from the pillar finisher.
To begin, remove the front door welt away from the front pillar finisher.
Insert a suitable tool and release the front pillar finisher and pull it partially away from the pillar to reveal the tether clips.
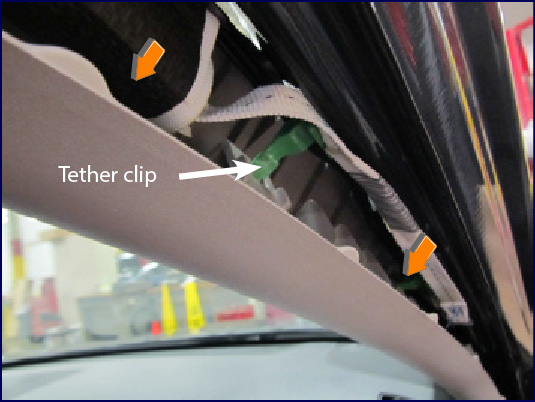
Carefully insert the needle nose pliers or snips between the front pillar and the front pillar finisher and cut both tether clips. Make certain not to cut the harness while you are cutting the green colored tether clips.
Using suitable tools, remove the remaining portion of the tether clips from the pillar and the finisher.
NOTE:
a. Grab the tether clip and turn it to align the tether clip tab end with the mounting hole to remove the remaining portion of the clip from the finisher.
b. Lift the remaining tether clip (grommet side) up with a flat blade screwdriver, grab and pull with the pliers or clip remover to remove from the pillar.
Replacing Tether Clips on a Front Pillar Finisher
The tether clips are available as a service part.
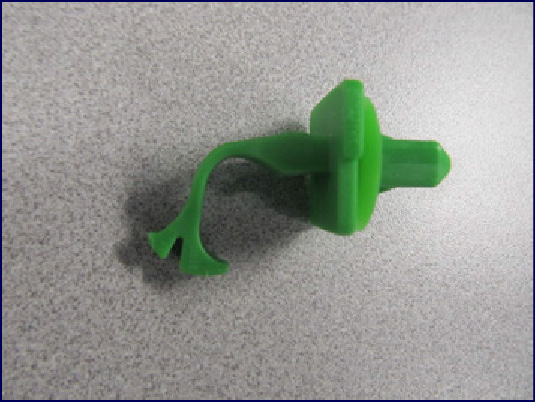
Position a new tether clip so that the tether tab aligns with the mounting hole on the back of the front pillar finisher.

Insert the tether clip tab into the mounting hole.
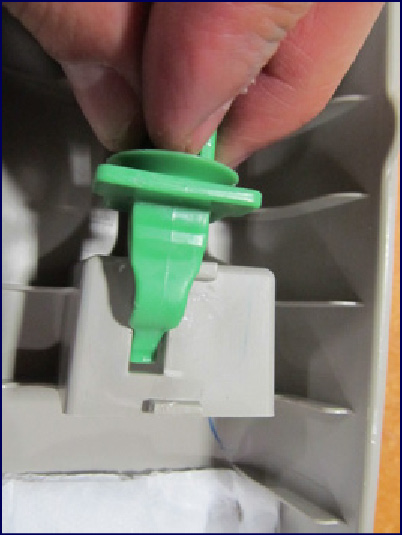
Twist the tether clip so that the tether clip tab turns and engages securely.
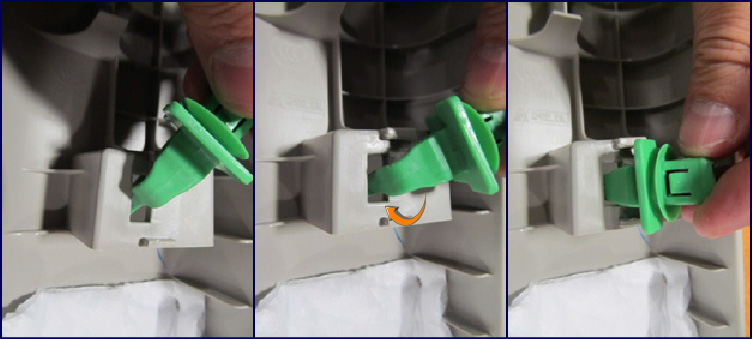
Push the tether clip down into the finisher mounting hole up to the grommet side plate as shown.
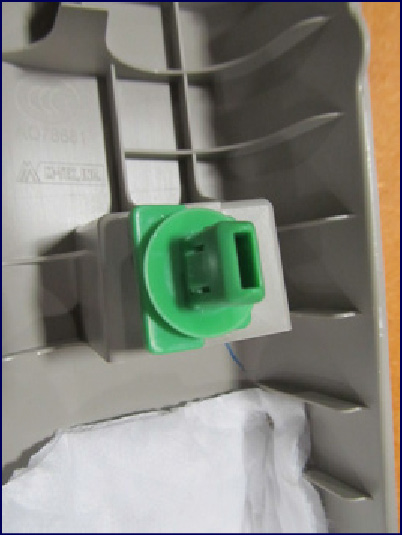
NOTE: When installing a front pillar finisher, check that the metal clip, tether clip, and pawls are securely engaged.
Following the tips and care suggested in this article will help you to remove and reinstall the applicable finishers properly without marring the finishers, or breaking the securing clips or pawls. It is recommended to use the (J-46534) Trim Tool Set for removing most finisher components.
When removing (disengaging) components with a metal tool (such as a metal screwdriver), be sure the wrap the tool with cloth or vinyl tape to protect the finisher. In some cases, covering the finisher is also a good method of protection.
- Replace a deformed or damaged clip (if available as a service part).
- If a part is specified as a non-reusable part, always replace it with a new one.