
The Rogue’s interior has been built with the high standards of fit specifications. If it becomes necessary to remove any finisher parts when making repairs on the applicable vehicle, the following quick tips will help you to properly remove them from their fastening points and reinstall them without breaking clips or damaging parts.
Front Kick Plate Removal
Rogue (T32)
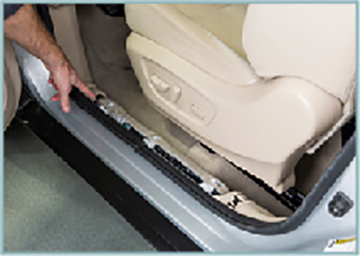
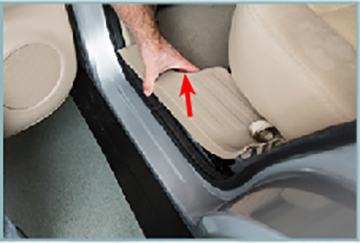
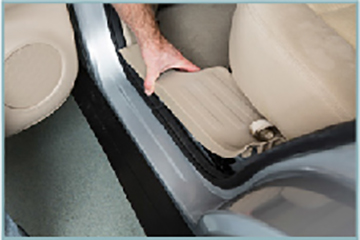
To remove the front kick plate on both the right and left sides, start by moving the seat all the way forward. This will provide the room needed for your hands.
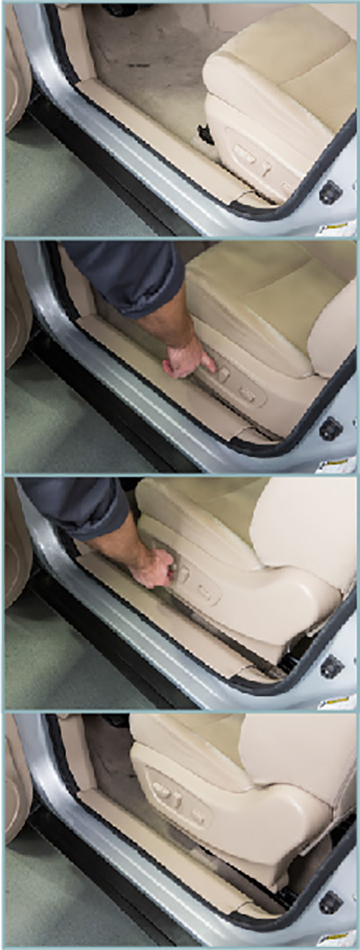
NOTE: If equipped with power seats, raising the seat to the full forward and full up position will give you the most room for your hands to remove the kick plate.
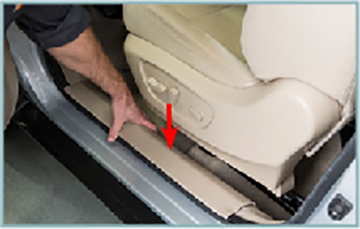
Now, reach in with your hand and place your fingers up under the lower rear edge of the kick plate panel and slide them forward until you feel the rear clip release the rear pawls by twisting the kick plate upward.
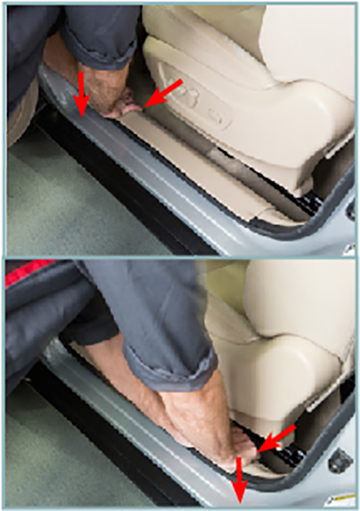
Next, move to the front of the kick plate and put your fingers up under the lower front edge and twist up until you feel the front clip release.
Finally pull the kick plate straight out.
Front Kick Plate Installation
Rogue (T32)
Installation is in the reverse order of removal.
To install the front kick plate, make sure to line up the clips on the kick panel with the body panel holes in the vehicle.
Once they are lined up, press down on the top of the kick plate and inward on the side to latch the clips securely into place.
IMPORTANT NOTE:
- Before installation, visually check the clips and pawls for deformation or damage. Replace with new ones if necessary.
- When installing a front kick plate, check that the floor trim does not cover the harness protector slots.
- When installing a front kick plate, check that the clips and pawls are securely placed in the body panel holes.
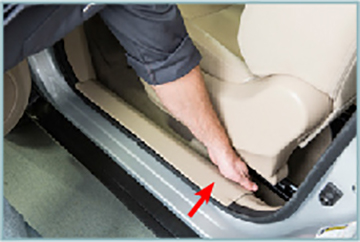
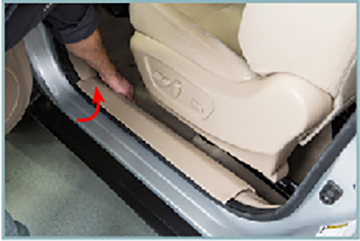
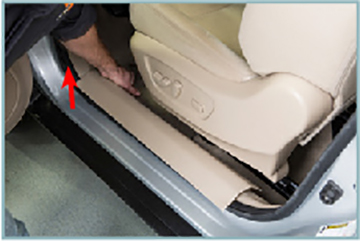
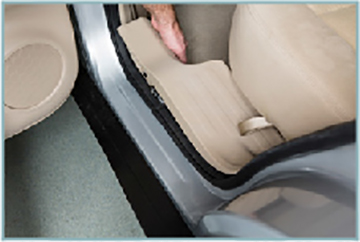
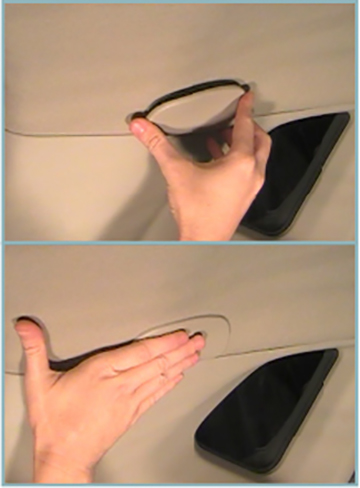
Rear Kick Plate Removal
Rogue (T32)
To remove the rear kick plate on either the right or left side of the vehicle, start by inserting your fingers up under the front lower edge and twist up and out until you feel the tab release.
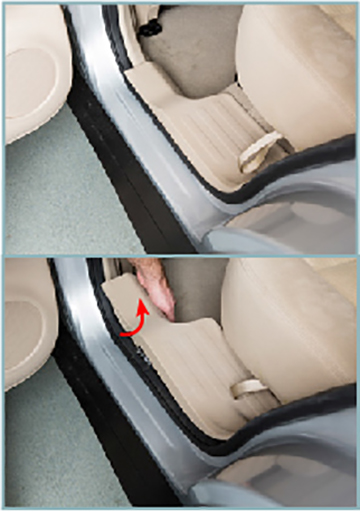
Then pull the rear kick plate straight up and out.
NOTE: Be careful that the seal does not come with the kick plate. Sometimes they will stick together.
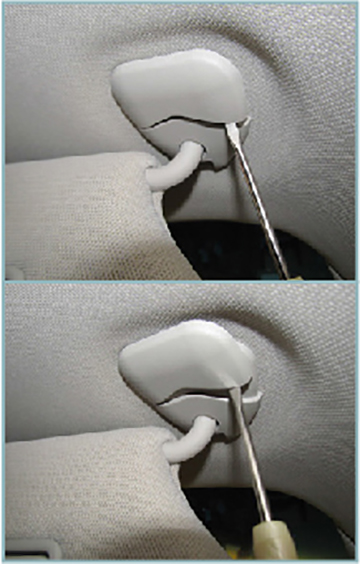
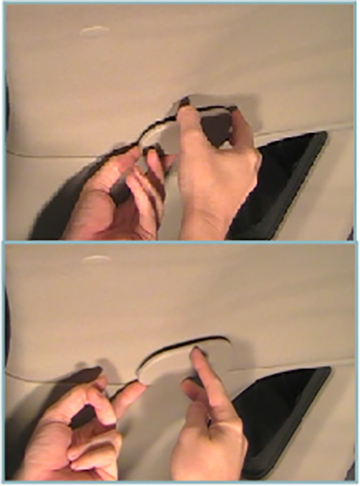
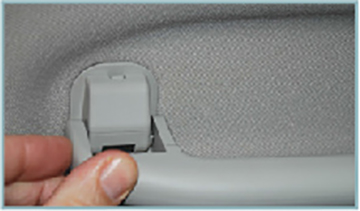
Sun Visor Headliner Finisher Cap Removal
Rogue (T32)
If you need to remove a headliner for any reason, the sun visor bracket will need to be removed. Perform the following procedure to remove the sun visor bracket finisher cap without damaging the headliner or marring the finisher.
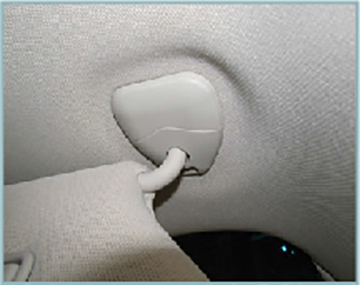
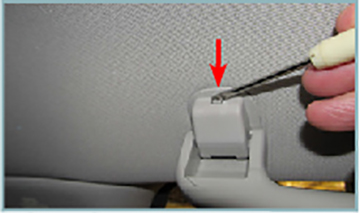
Carefully insert a small flat head screwdriver (or a suitable tool) to release the cap at the point shown near the headliner. Take care not to damage the headliner or the finisher cap surface.
Lift the corner of the sun visor headliner cap finisher with the flat head screwdriver and gently pull up and back.
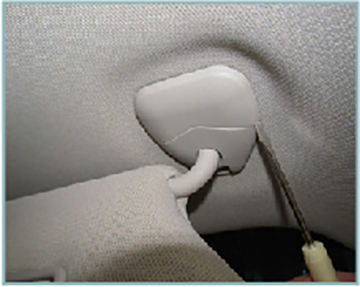
Continue lifting the corner of the sun visor headliner cap finisher pulling with the flat head screwdriver outward and toward you.
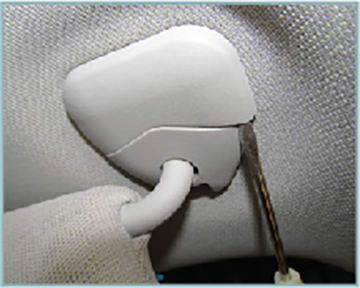
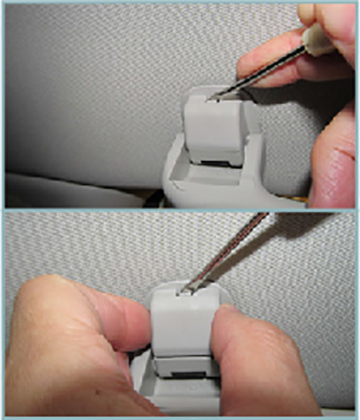
Continue lifting the corner of the sun visor headliner cap finisher with the flat head screwdriver. Then, begin lifting the corner of the sun visor headliner cap upward.
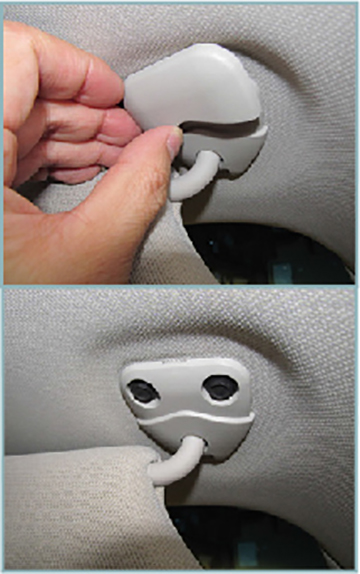
Grasp the corner of the sun visor headliner cap finisher and pull it up and away from the bracket.
You can now remove the sun visor bracket from the headliner.
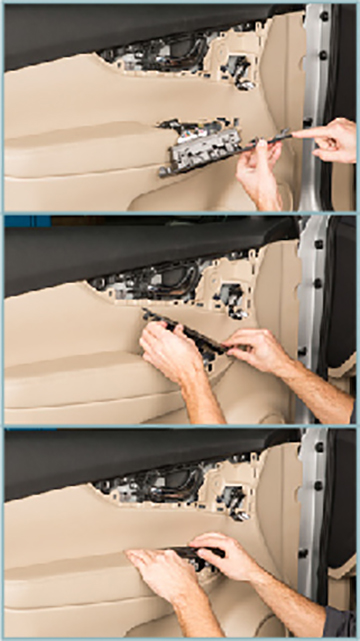
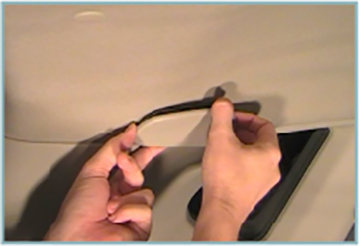
Front Door Switch Removal
Rogue (T32)
If the front door switch on the driver or passenger side front door on a Rogue (T32) has to be replaced for any reason, perform the following procedure to remove the switch without damaging the finisher fastening points.
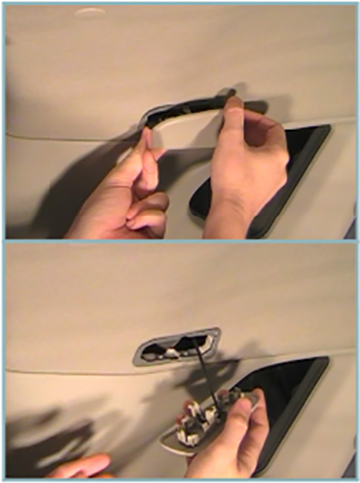
To remove the front door switch, start by removing the front door inside handle finisher by grabbing and lifting up at the front edge of the finisher and pulling outward. Continue pulling outward with both hands along the finisher being careful not to bend or break the finisher.
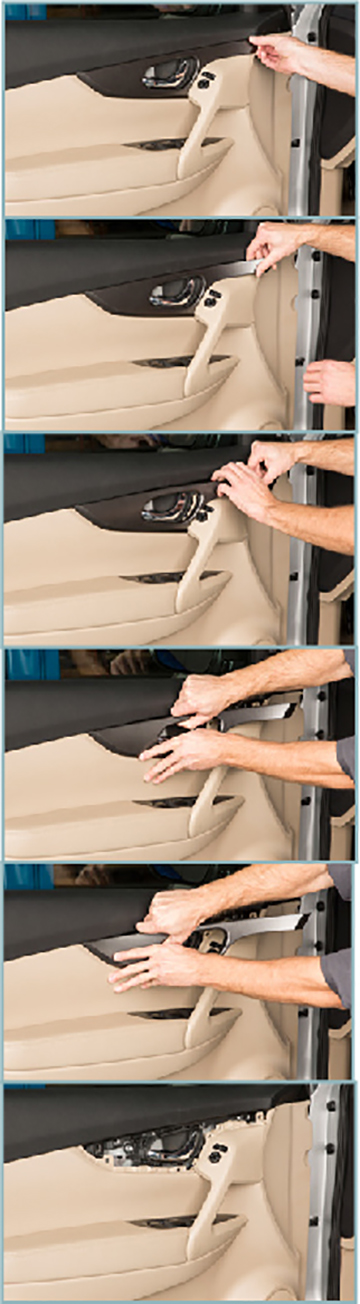
Next, grasp the top of the front door pull handle finisher and pull outward to access and disconnect the wire harness connector from the switch.
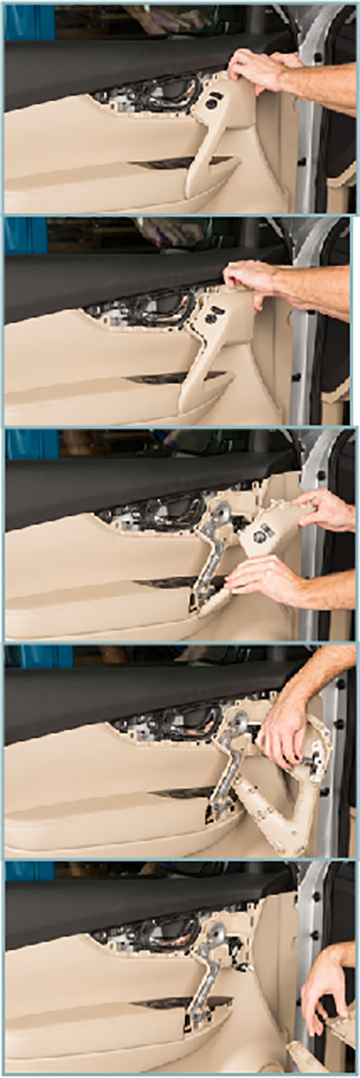
Now you can remove the three bolts from the front door pull handle bracket.
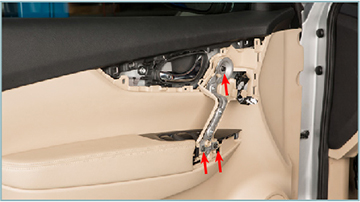
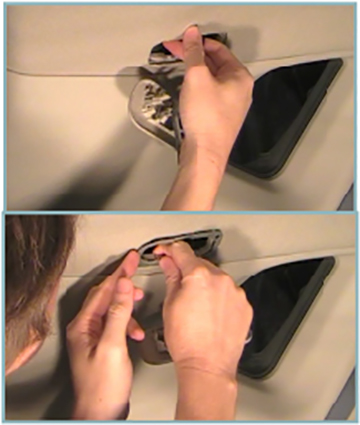
Pull from the top to remove the door pull handle bracket.
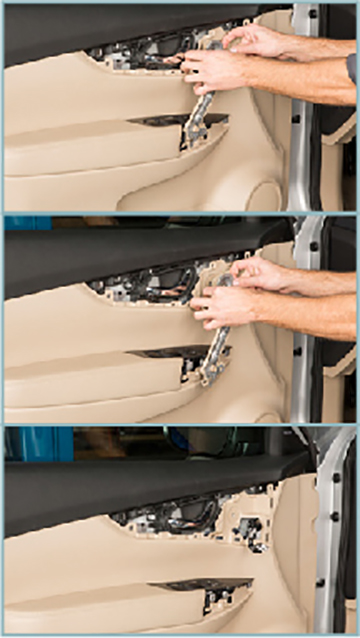
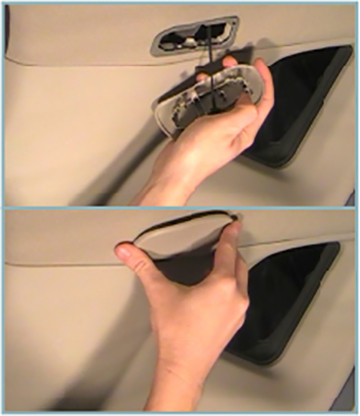
Next, grasp the back of the door switch finisher and pull up to remove it from the back clips. Continue pulling up and back to release the front clip.
Front Door Switch Installation
Rogue (T32)
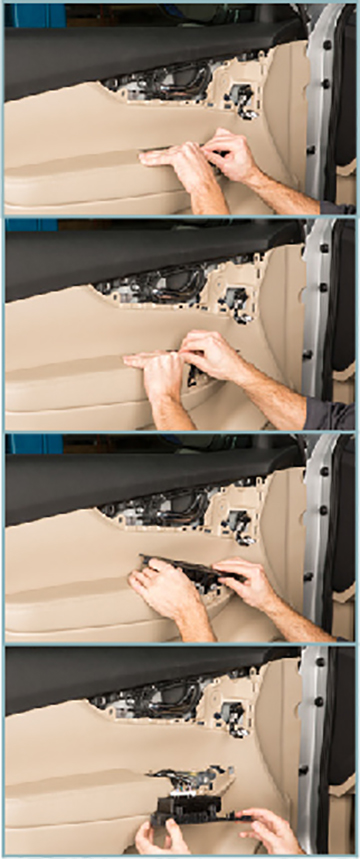
When reinstalling the front door switch, start by placing the clip in the front and then press down on the switch finisher.
NOTE: If the main power window and door lock/unlock switch or the RH power window door lock/unlock switch are removed or replaced, it is necessary to perform the initialization procedure.
Liftgate Door Panel Removal
Rogue (T32)
Only use a suitable small finesse tool when starting to pry the liftgate door finisher at the upper most LH clip then grip the finisher with your hands to release it from the clip by gently pulling down on the liftgate finisher.
NOTE: Do not use tools to remove the liftgate door panel finisher.
Start at the top of the liftgate finisher by the window and pry outward with your finger tips.
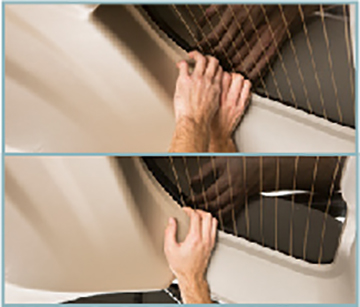
Once the panel starts to come off, pull down and work your way around the door panel pulling down with your hands to remove it from the remaining clips.
IMPORTANT NOTE:
When reinstalling the liftgate door finisher, check to be certain the clips are securely placed into the door panel holes.
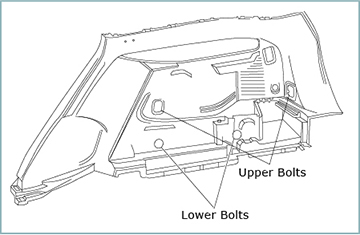
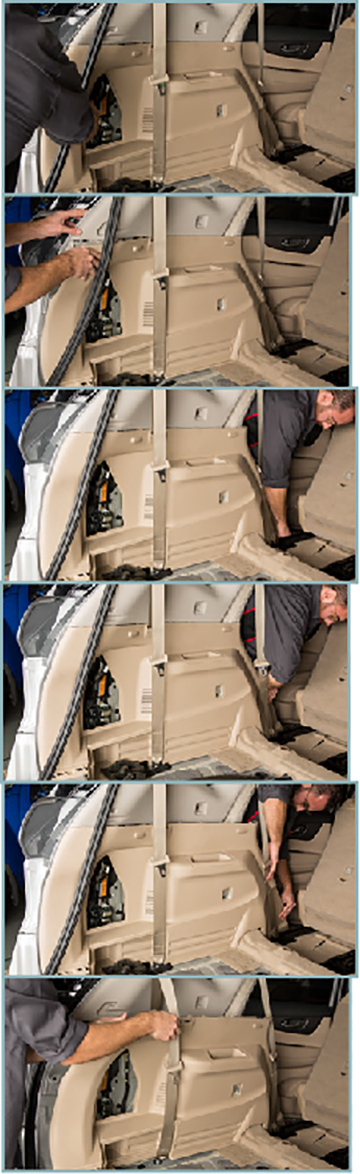
Luggage Side Finisher Removal
Rogue (T32)
Start by removing the two covers and the spare tire cover. If the vehicle has a third row seat, you will need to remove the third row seat.

On vehicles with a third row seat, there are two bolts that need to be removed. They are located under the hook covers.
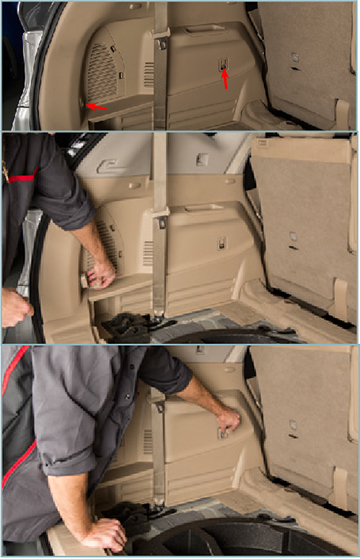
On vehicles without a third row seat, there are four bolts that need to be removed. There are two under the hook covers and two lower bolts under the bolt covers.
Remove the lower half of the rear door seal.
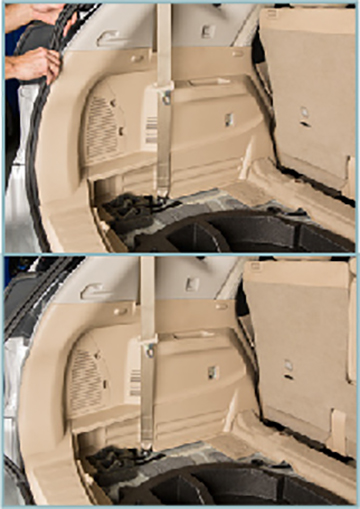
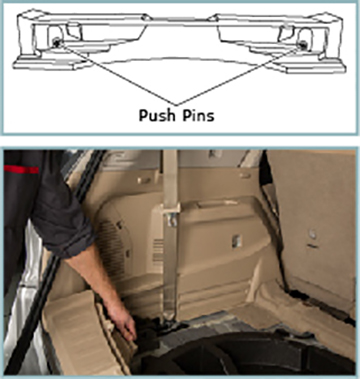
Remove the two push pins, striker cover and rear luggage plate.
Remove the rear door kick plate. To remove the rear kick plate, start by inserting your fingers up under the front lower edge and twist up and out until you feel the tab release.
Next, pull straight up and out.
Remove the rear door seal.
If equipped with a third row seat, remove the rear latch assembly.
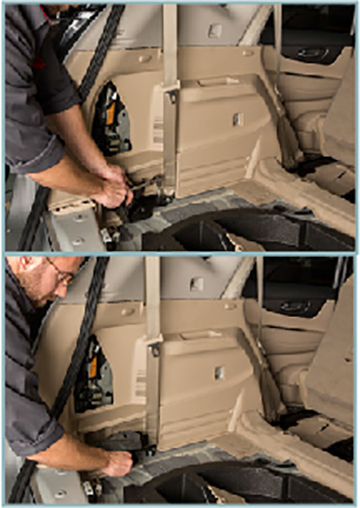
Remove the luggage side finisher by pulling outward starting at the rear by the luggage plate and working up and forward.
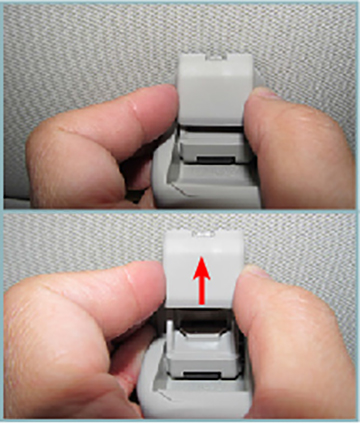
Holding Cap Removal
Rogue (T32)
Using your fingers, pull outward on the cap. It will come out a few millimeters.
While pulling the holding cap down, push the clips inward to release them.
Slide the cap forward and out.
Holding Cap Installation
Rogue (T32)
If the metal retainer comes out when you are removing the holding cap, realign it with the tabs inside the plastic retainer on the back side of the headliner and clip them together.
Align the tabs on the side of the holding cap and press in and slide to the rear.
Finally press the holding cap fully inward being careful not to crease the headliner.
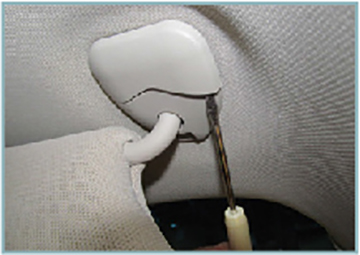
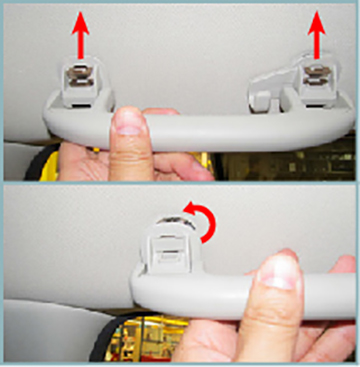
Assist Grip Removal
If you need to remove or lower a headliner from a Rogue (T32) for any other reason, the front assist grips (without coat hanger) will need to be removed. Perform the following procedure to remove the assist grip without damaging the assist grip steel clip bracket, the headliner or marring the finisher.
Carefully insert a small flat head screwdriver or use a suitable small flat trim tool to release the cap tab at the point shown below in the photo. Be careful not to damage the headliner or the assist grip finisher cap.
Grasp the assist grip finisher handle and rotate the handle downward and then push the small tab toward you with the flat head screwdriver.
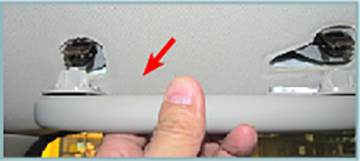
Lift the cap finisher up off the grip handle.
Lift the assist grip handle up just a small amount to remove it off the bracket tabs while pulling it outward to release it.
Remove the assist grip handle.
NOTE: Remove or lower the headliner without removing the steel assist grip clip bracket.
