

Engine Control Modules (ECM) replacement parts can now come without software, (I.e. Current ECMs for the 2013 Sentra and Versa Sedans). There are new procedures for Programming these "blank" ECMs. If you can access the ECM part number (P/N) with CONSULT-III plus, its current internal P/N and VIN can be saved and then applied to the "blank" ECM. If the ECM cannot be accessed with C-III plus, the P/N to be programmed will need to be determined by how the vehicle is equipped and system applications such as ABS, CVT, etc. Replacement blank ECUs should be ordered using the vehicle identification number (VIN). This should be entered into the Nissan Electronic Parts Catalog to insure the correct replacement part is used. The part code 22611N will give the correct part number for the blank ECM.
Programming Procedure
The programming of a "blank" ECM is similar to reprogramming a replacement ECM, you'll need to follow additional steps to Program a "blank" ECM.
For vehicles where the ECM can be Accessed with C-III plus:
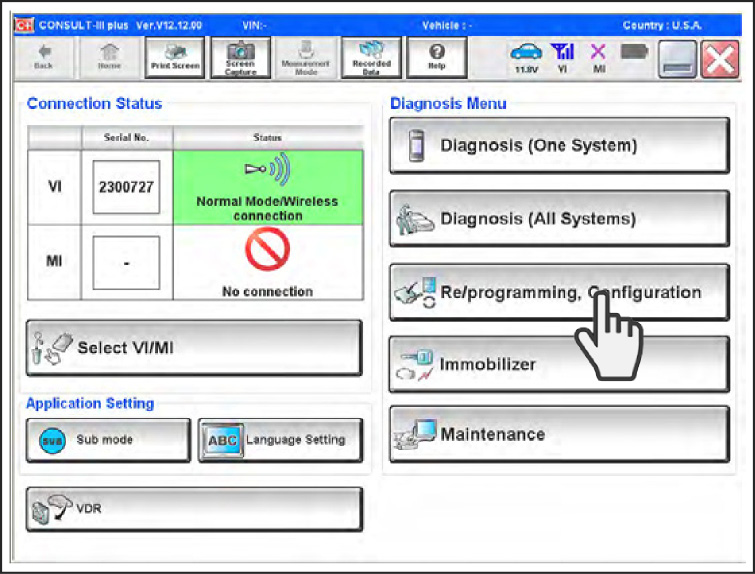
1. Connect and launch C-III plus. From the C-III plus Diagnosis Menu on the home page, Select the Re/Programming, Configuration button.
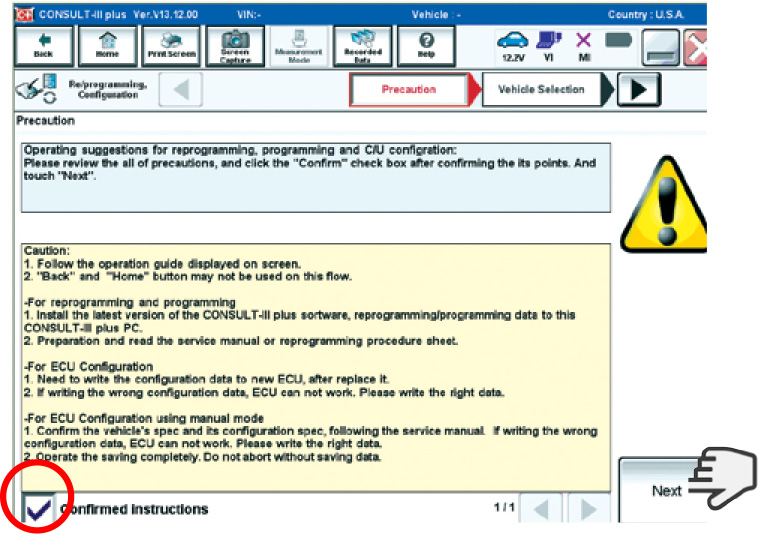
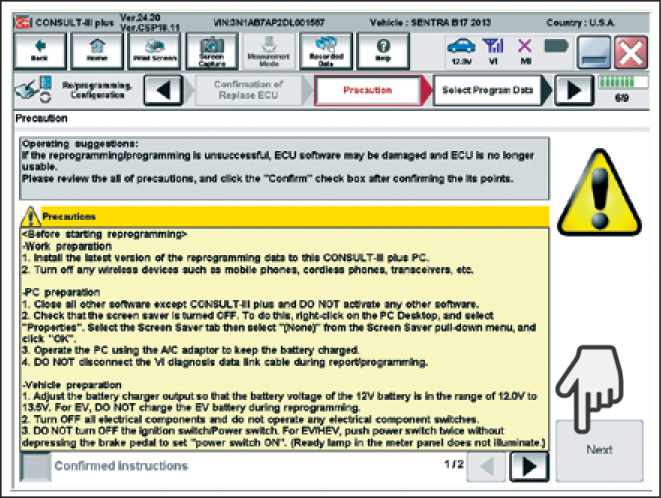
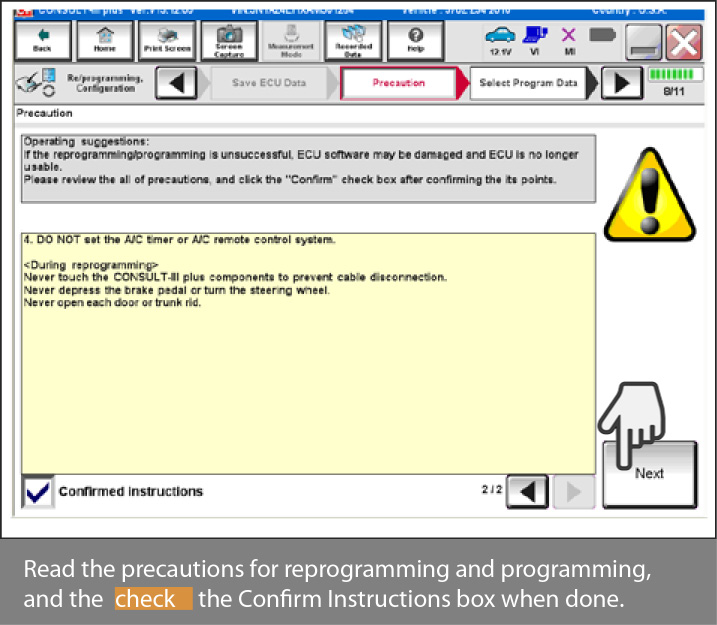
Note: Using the arrow keys, scroll through and read all the precautions. Check the box confirming that you've read all the precautions once completed, and then select Next.
2. Use the Automatic Selection (VIN) tab to identify the vehicle from the VIN. Click on Confirm once the vehicle is identified, and System Call will begin. Once System Call is complete, select Confirm again to bring up the System Selection screen.
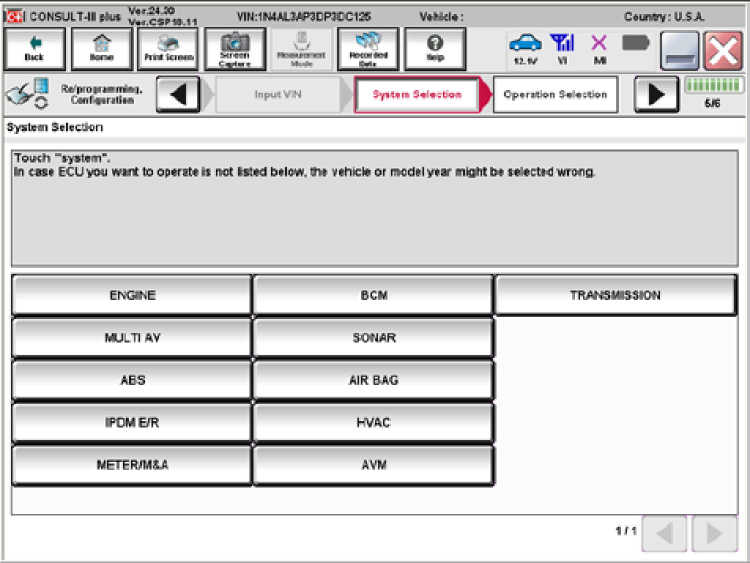
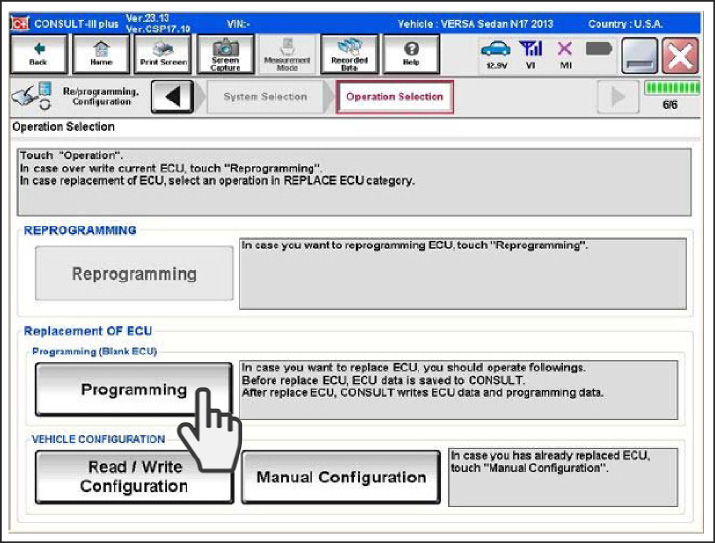
3. Select Programming.

4. Select, Before ECU Replacement.

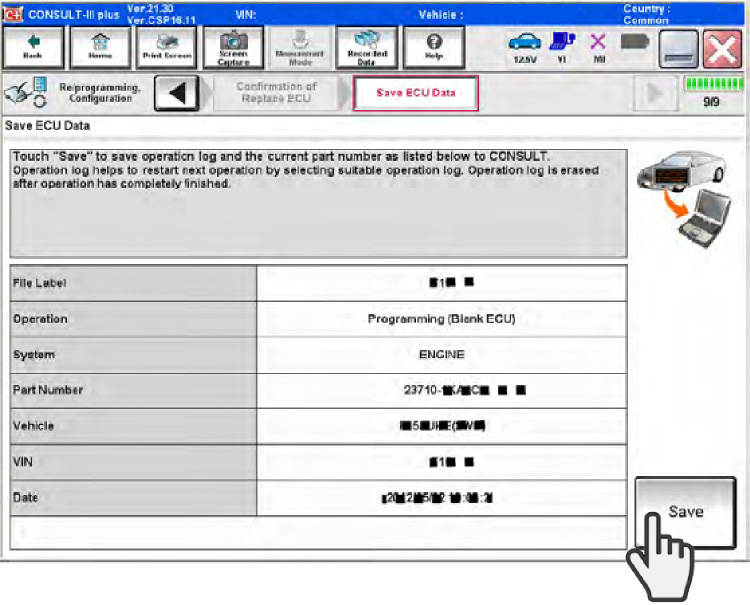
5. A screen should appear with the ECU Data listed, that includes the VIN and software reference part number. Confirm that everything matches then select Save, (saves the current ECM P/N and VIN in CONSULT), and then select Next.
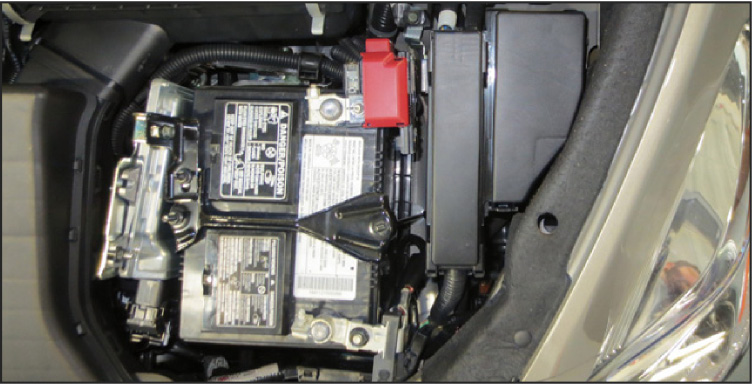
6. Turn the ignition switch to OFF. Replace the incident control module with the blank control module service part. Follow the procedure for module replacement from the service manual. It will not be necessary to disconnect the VI or shut down the CONSULT-III plus application during this process.
Once the blank control module is installed, set the ignition to ON, and establish a connection between the VI and the CONSULT-III plus application, if necessary.
7. Select Re/programming, Configuration from the Diagnosis Menu and make sure all the Precautions are still being observed.
If necessary select the model and model year from the Manual Selection tab and click on Select, and then Confirm.
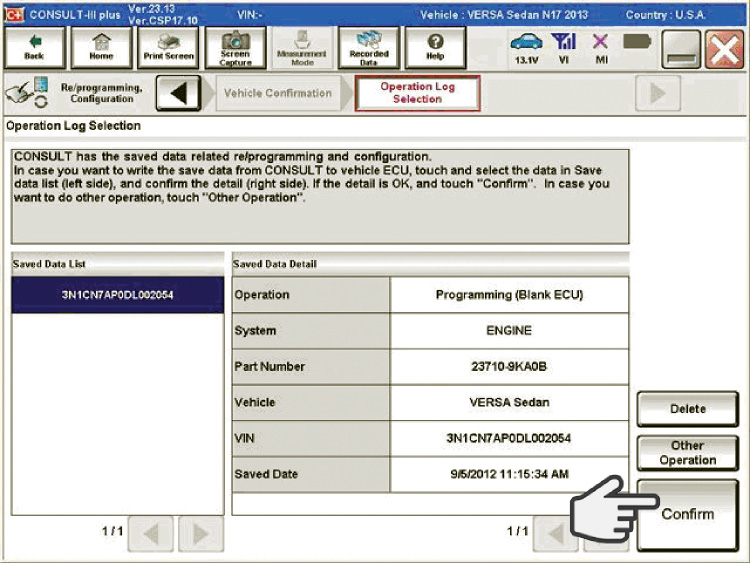
After System Call completes, The Operation Log Selection screen should appear. Verify the VIN for your vehicle is displayed, if it matches select Confirm.
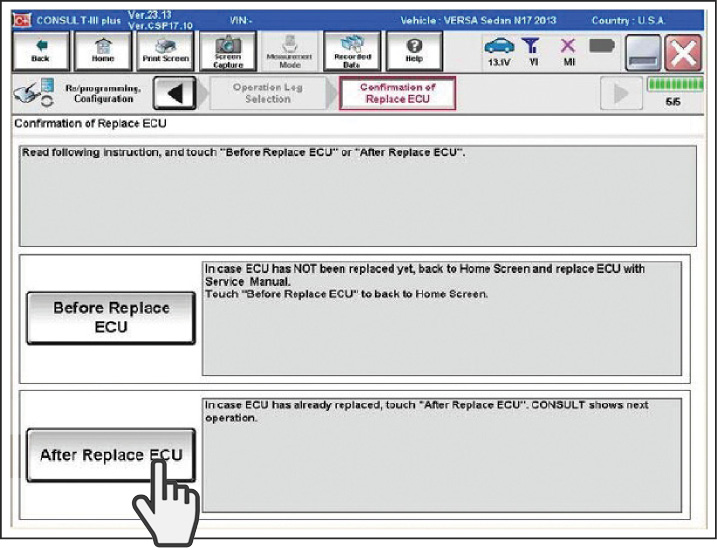
8. Select After ECU Replacement, review the precautions carefully.
Note: Set the ignition to ON but do not start or run the engine during programming. Turn off all electrical loads that may be on such as the climate control system, audio system, rear window defogger. This will prevent excessive drain on the vehicle battery.
The Select Program Data screen should appear.
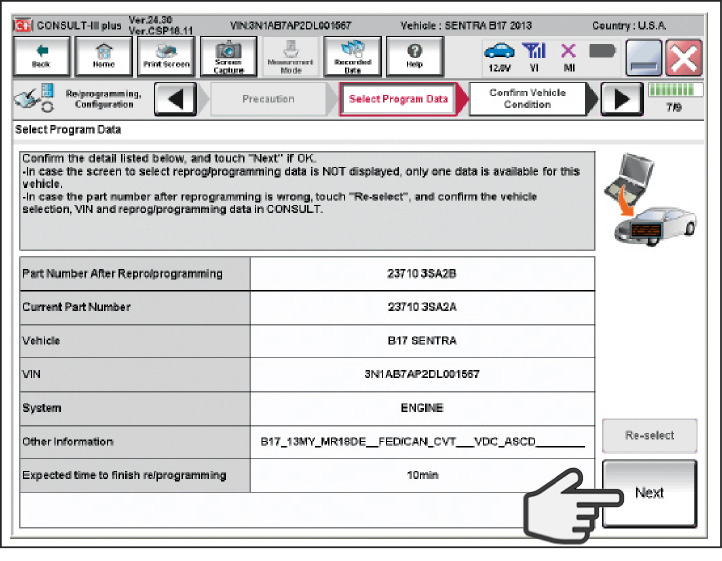
Verify the data on the screen is correct and select Next. If the battery voltage is too low, the Confirm Vehicle Condition screen will show a NG result in a red box.
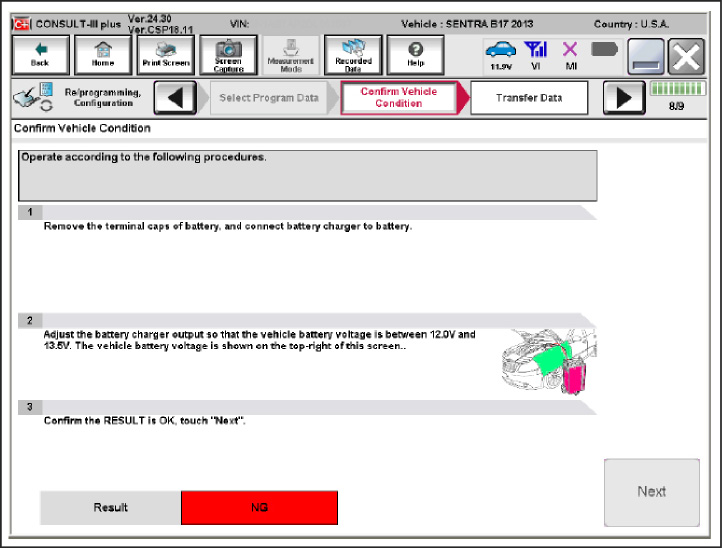
Note: If this occurs connect a charger to the battery or if already connected switch the charger to a higher range.
The Result status should change to OK.
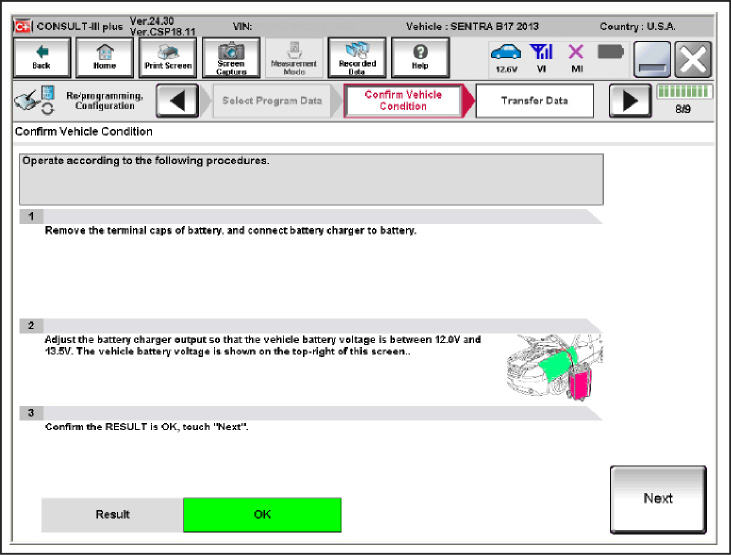
9. Make sure OK is highlighted green, (the battery voltage must remain between 12.0V and 15.5 volts during ECM programming). Select Start. Programming will begin when Start is selected.

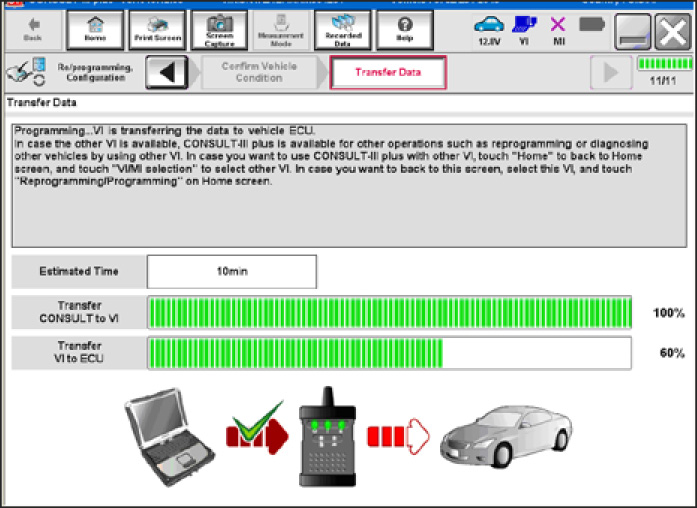
Note: Allow programming to complete. During this process DO NOT set the ignition to OFF, turn OFF the C-III plus or disconnect the VI. This may damage the ECM. Wait for the progress bars to complete.
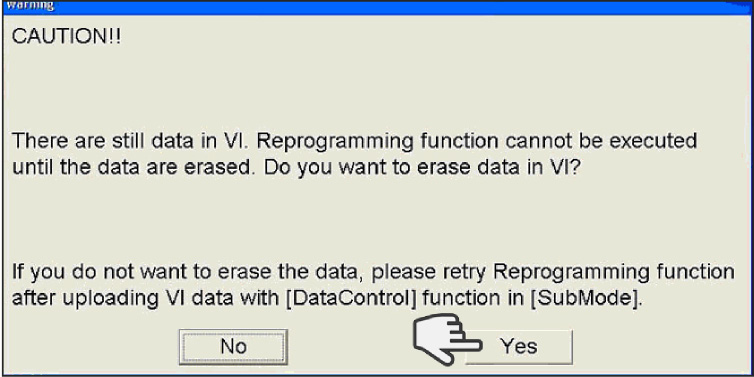
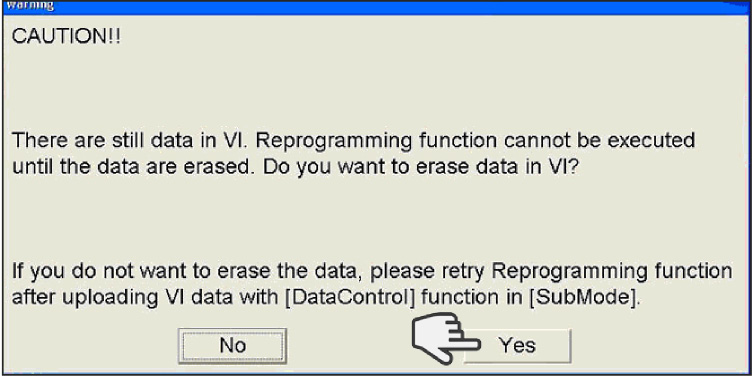
Note: If there is data stored in the VI, a Caution message will appear. Select YES to proceed with programming.
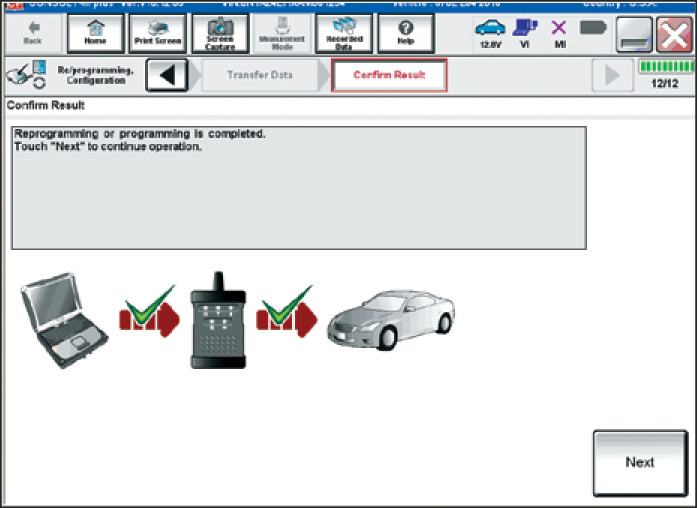
10. Once programming has completed, the Reprogramming or Programming is completed screen will display.
For vehicles where the ECM is NOT Accessible with C-III plus:
1. Install the new "blank" ECM into the vehicle.
2. Determine the part number that will be selected during the programming operation by entering the VIN of the vehicle being repaired into the Nissan Electronic Parts Catalog (WIN FAST or equivalent).
Note: Always use the VIN when looking up the replacement blank ECM P/N. When using the VIN, the parts catalog will also display the ECM software reference P/N listed for ENGINE CONTROL MODULE. Write the P/Ns down to use them in the programming procedure.
The first five digits of a replacement blank ECM P/N will start with 23703-xxxxx.
3. Install the replacement "blank" ECM in the vehicle.
4. Connect C-III plus, and then proceed to Re/Configuration.
5. Read all precautions, and check the box confirming the precautions have been read, and then select Next.
6. Select Nissan, Vehicle Name, and then the correct Model Year.
7. Select Programming.
8. Select After Replace ECU.

9. Type in the VIN, and then select Confirm.
10. Select the ECM software P/N from the list that matches the one written down from the parts catalog.
11. Select Start and wait for both progress bars to complete.
Note: If there is data stored in the plus VI. Select Yes to proceed with programming.
12. When the programming is complete screen displays, disconnect the battery charger from the vehicle, and then select Next.

If programming does not complete and the "!?" symbol displays:

- Check battery voltage (12.0 – 15.5V).
- The ignition is ON and the engine is OFF.
- Confirm that all external Bluetooth® devices are OFF.
- Confirm that all electrical loads are OFF.
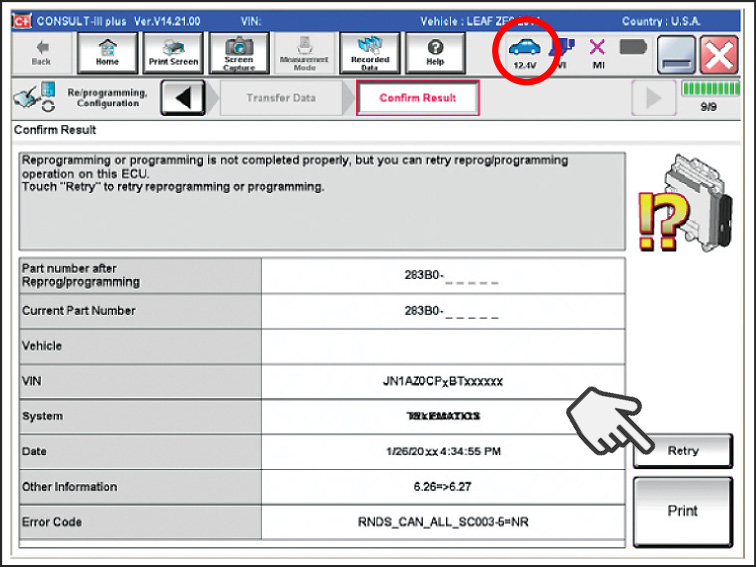
Select Retry and follow the on screen instructions.
Note: Retry may not go through on the first attempt. It can be selected more than once.
If programming does not complete and the "X" symbol displays:
- DO NOT disconnect the plus VI or shut down C-III plus if reprogramming does not complete.
- Check battery voltage (12.0 – 15.5V).
- Make sure the CONSULT A/C adapter is plugged in.
- Make sure the ignition is ON and the engine is OFF.
- Confirm that the transmission is in Park.
- Confirm that the C-III plus / plus VI cables are securely connected.
- Confirm that the C-III plus updates have been installed.
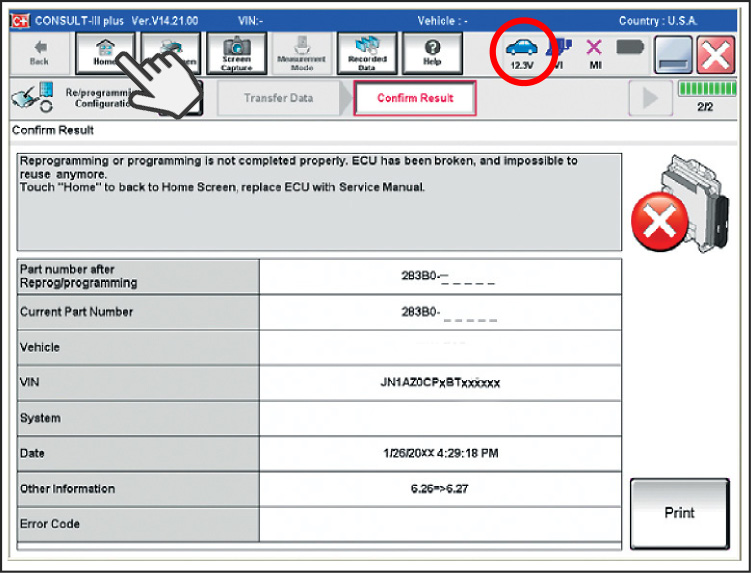
Select Home, and then restart the reprogram procedure from the beginning.
After Programming has Completed
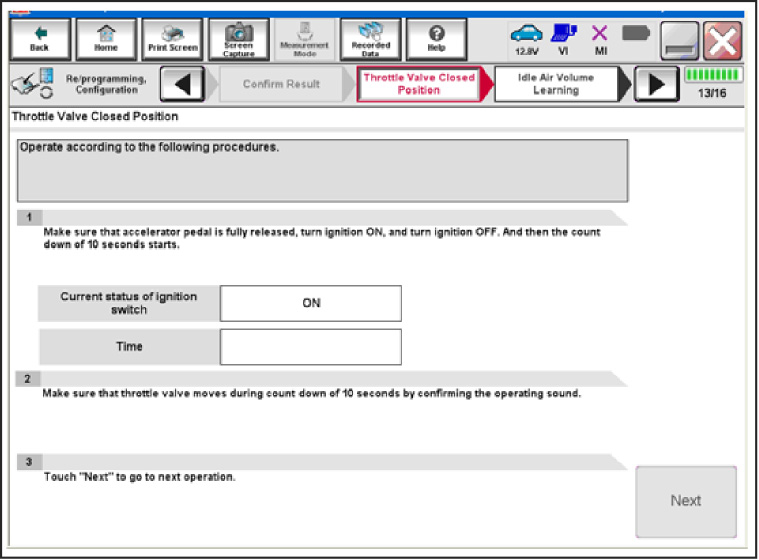
After completing ECM programming, additional steps / operations are required before C-III plus will provide the final programming confirmation report.
For vehicles where the old ECM could be accessed by C-III plus during previous diagnosis, perform the following:
- Throttle Valve Closed Position
- Idle Air Volume Learn
- Accelerator Pedal Close Position
- Check for and erase any DTCs
Note: When the old ECM could NOT be accessed by C-III plus, also Enter (register) the VIN.
For additional information on these procedures, refer to NTB12-035 , and watch SIR 176 "Programming Blank Control Modules."
For vehicles where the old ECM could NOT be accessed by C-III plus during previous diagnosis, also perform the Enter (register) the VIN.
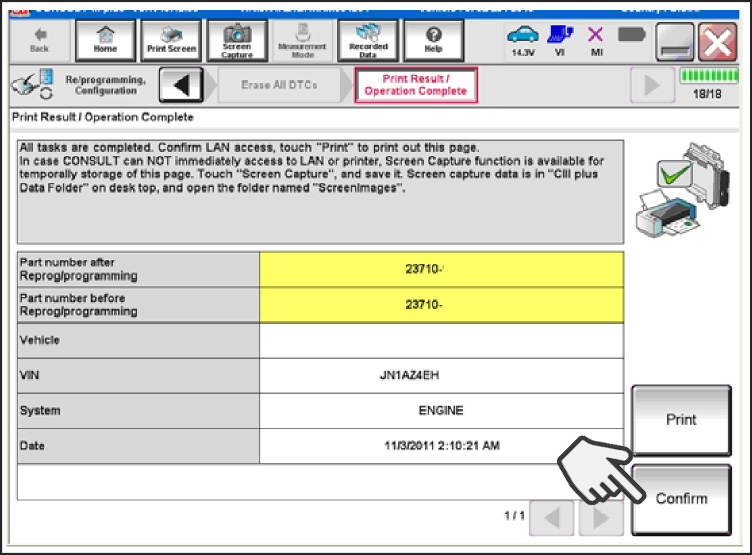
1. Verify the before and after part numbers are different.
2. Print a copy of Print Result/Operation Complete screen and attach it to the repair order.
3. Select Confirm.
Note: If you cannot print the Print Result/
Operation Complete screen:
a. Select Screen Capture.
b. Name the file.
c. Save the file in My Documents. - A copy of the screen is now saved in the CONSULT PC. It can be retrieved and printed at a later time.
4. Close C-III plus.
5. Turn the ignition OFF.
6. Disconnect the plus VI from the vehicle.